Authsignal integrates with Azure AD B2C by acting as an OIDC provider - this
integration model can also be used for other platforms which support OIDC.
Prerequisites
This guide assumes that you have already set up an Azure AD B2C tenant and are using custom policies. If not, it is recommended to familiarize yourself with Azure AD B2C custom policies and to follow Microsoft’s official getting started with custom policies guide before continuing. We also assume that you have an Authsignal tenant created, with at least one Authenticator enabled. Enable an Authenticator on your Authsignal tenant here.Try a live demo!
Sequence
The following sequence diagram demonstrates the necessary orchestration steps and corresponding requests when using Authsignal as an MFA provider for Azure AD B2C.Code example
You can find a full code example and starter template referenced in this guide on Github. This guide builds on top of the SignUpOrSignIn policy from the Azure AD B2C starter pack.Step by step guide
Step 1: Add orchestration steps to your user journey
Add the following five steps to your user journey. These steps should be performed after the user has been identified, but before the user is authenticated and issued a token.Step 2: Add the base technical profile
This is the base technical profile that is used to connect to the Authsignal Connect (OIDC) API by setting the authorization header, request body and other necessary configuration for the Azure AD B2C’s RestfulProvider. It is referenced by other technical profiles.Step 3: Add the init auth technical profile and corresponding input claims transformation
Replace theAUTHSIGNAL_CONNECT_HOSTNAME and INSERT_AUTHSIGNAL_ACTION placeholders with the appropriate values.
A list of available hostnames can be found in the OIDC documentation. You should use the hostname where your Authsignal tenant is located.
Technical profile:
INSERT_AUTHSIGNAL_ACTION placeholder with the desired Authsignal action.
Step 4: Add the OIDC authorize technical profile and corresponding output claims transformations
Replace theAUTHSIGNAL_CONNECT_HOSTNAME and INSERT_AUTHSIGNAL_TENANT_ID placeholders with the appropriate values.
Technical profile:
Step 5: Add technical profiles for the error pages
These are basic error pages shown when the authentication challenge is failed. It is using the defaultapi.selfasserted content definition. You may want to customize this page to suit your branding.
Step 6: Declare the claims used by the technical profiles
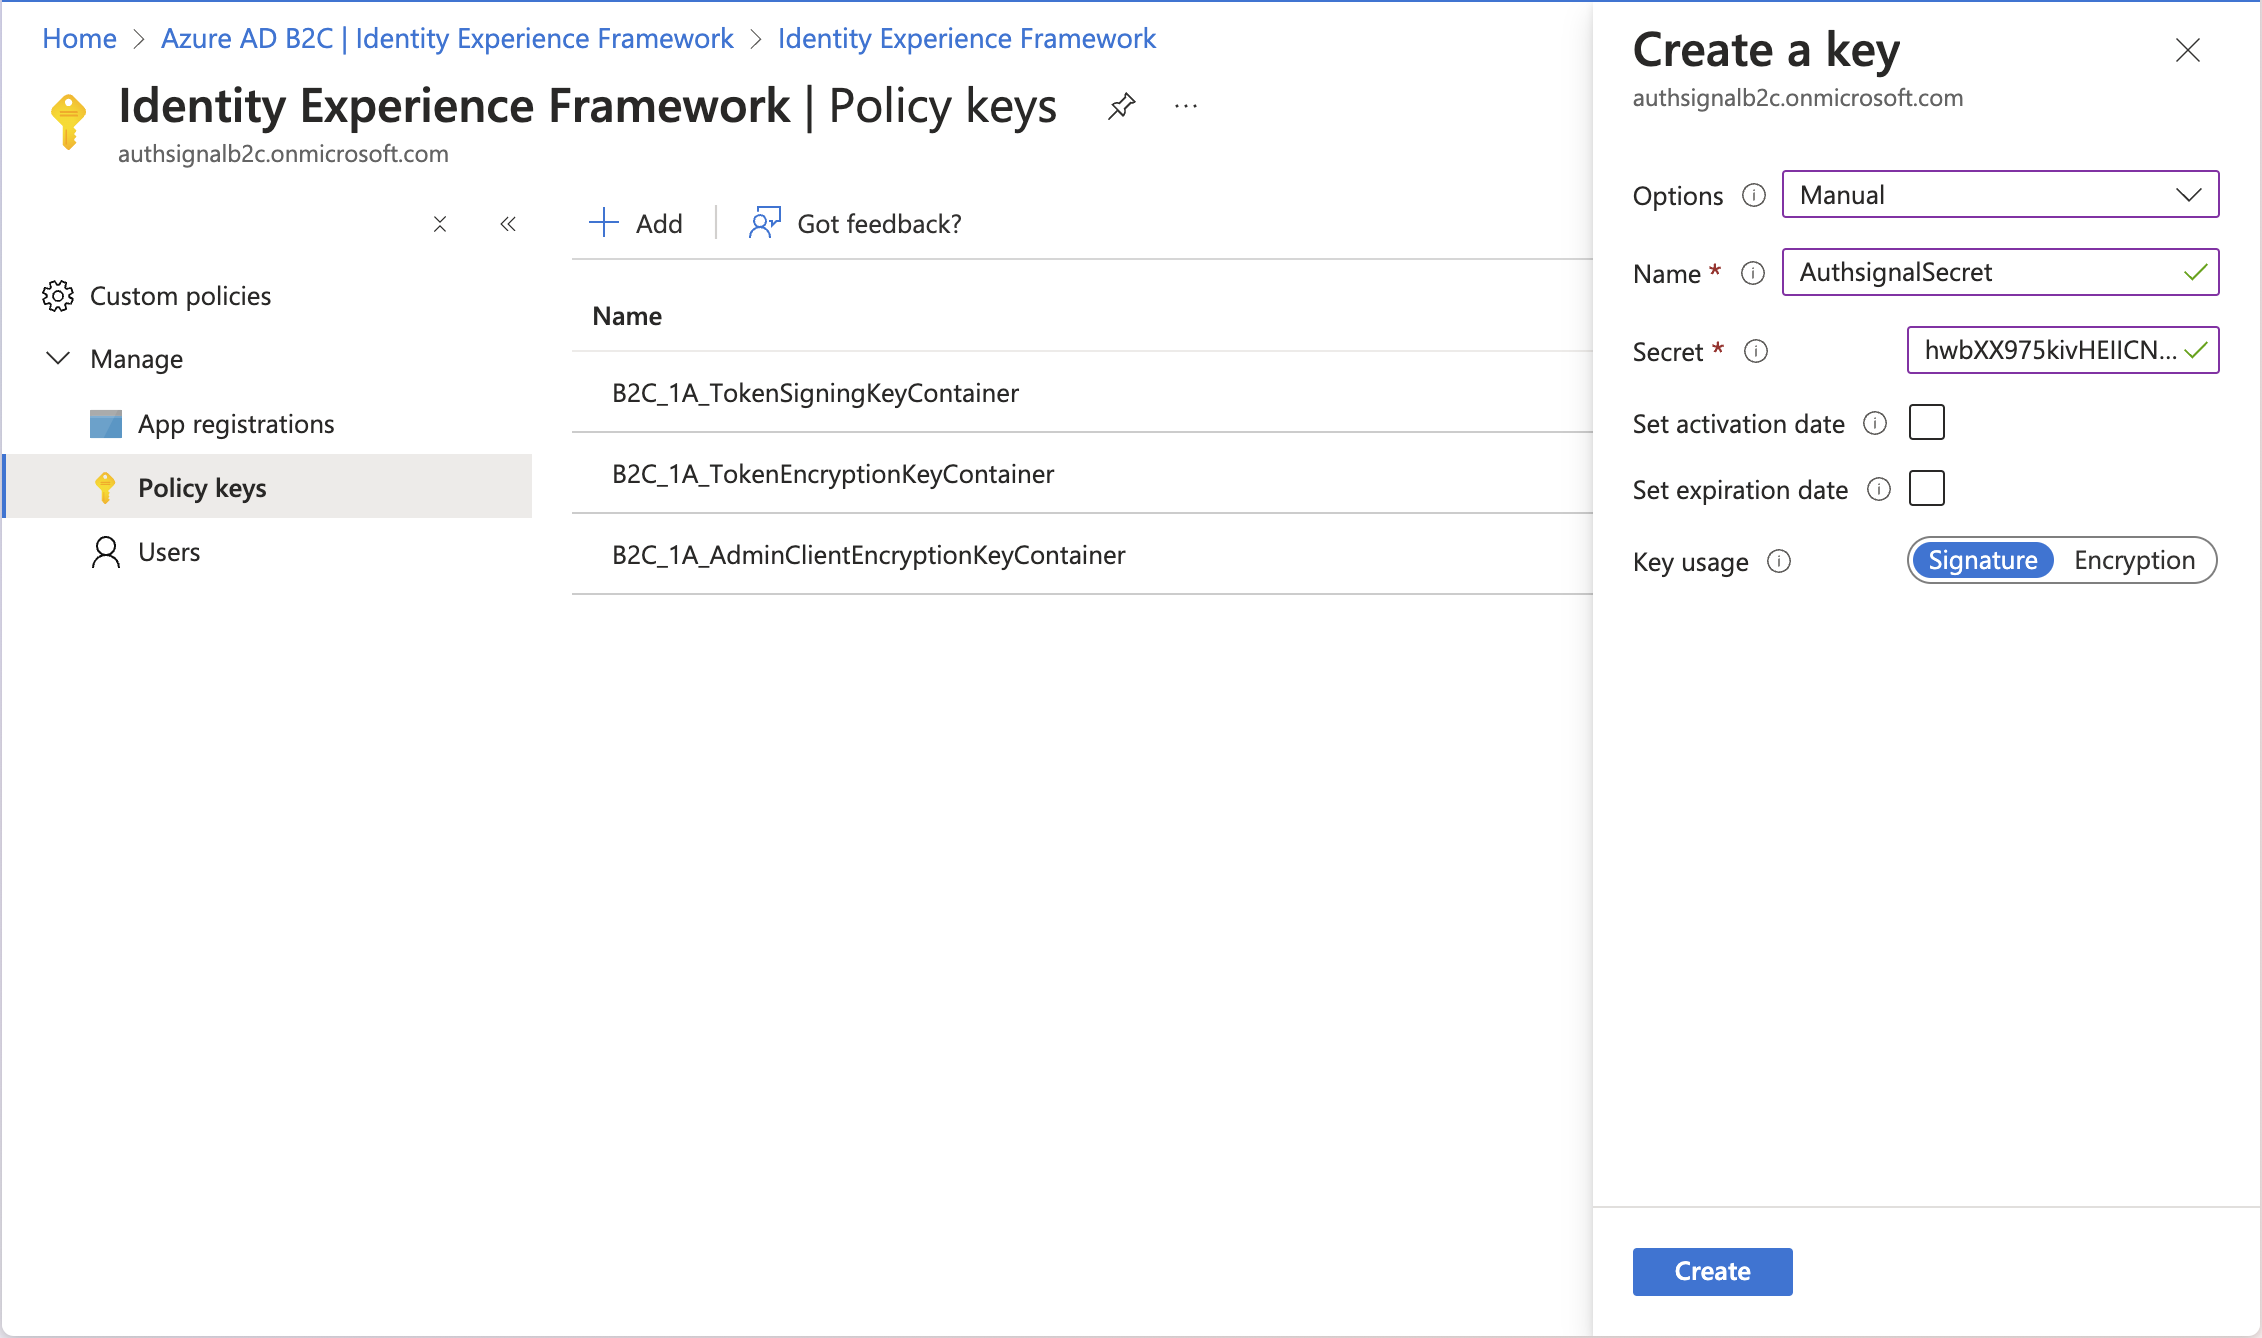
Step 7: Store your Authsignal Server API secret key on Azure AD B2C
Your Authsignal Server API secret key is stored as a policy key on Azure AD B2C’s Identity Experience Framework and referenced by our technical profile with the IdB2C_1A_AuthsignalSecret.
You can find the Server API secret key for your tenant in the API keys page and add it to your Azure AD B2C tenant as a policy key via the Azure Portal.