Github example code
Cognito lambdas
React Native mobile app
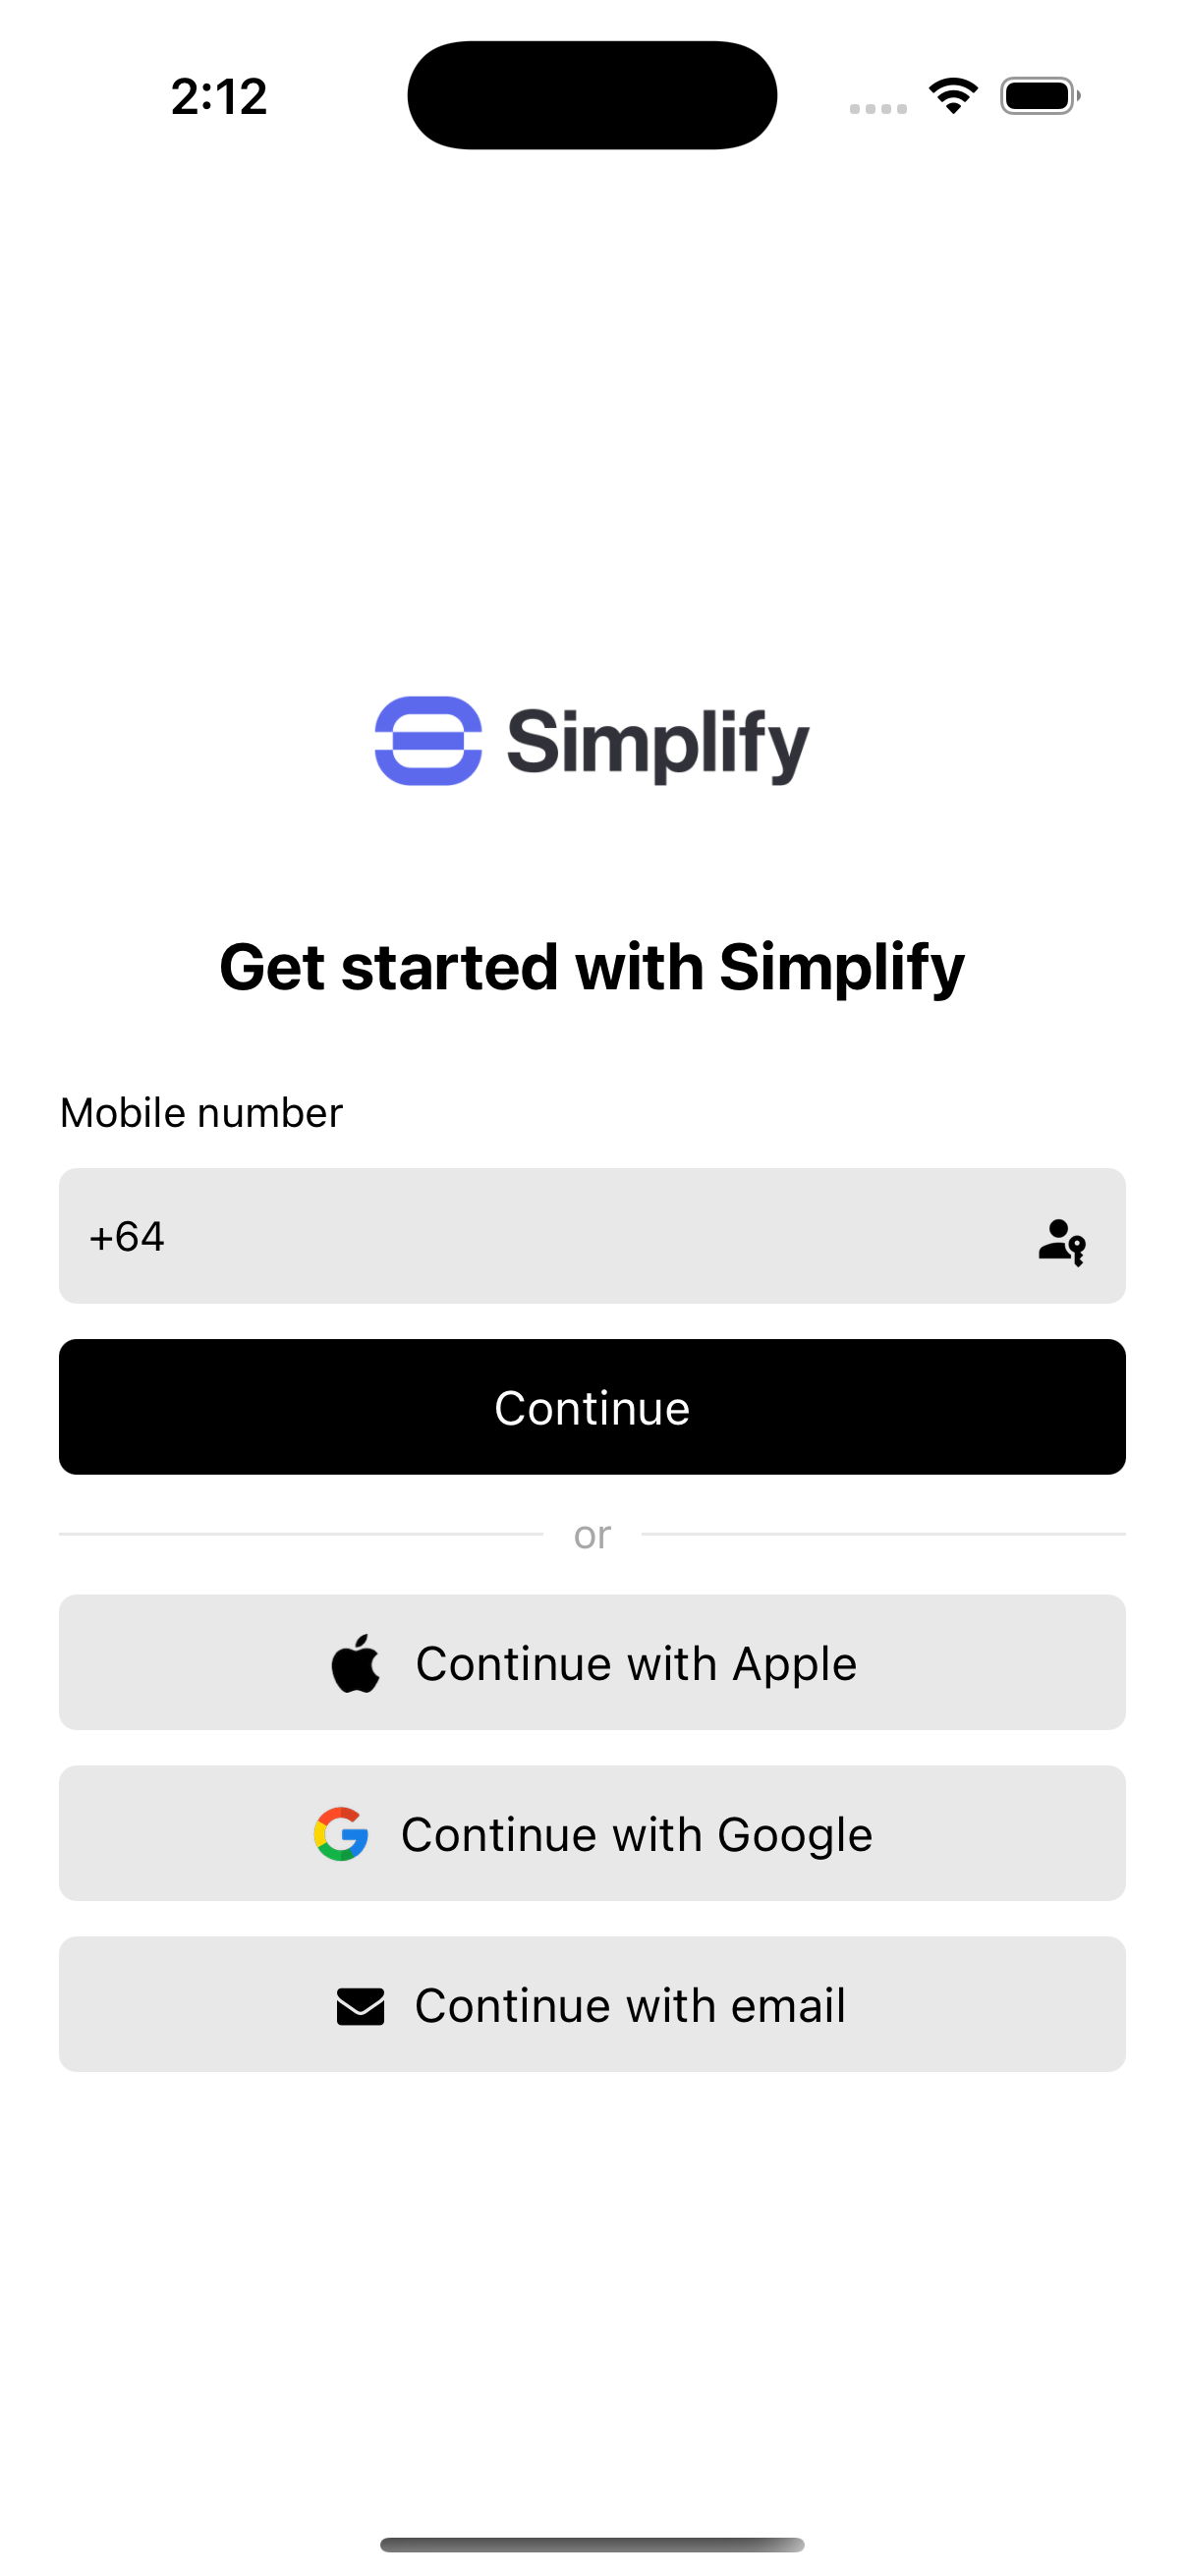
Authentication methods
Our example app uses Authsignal SDKs together with Cognito to rapidly implement five different authentication methods:- SMS OTP (or WhatsApp OTP)
- Email OTP
- Passkey
- Sign in with Apple
- Sign in with Google
SMS
SMS OTP is the first authentication method which we present on the sign-in screen.- Input their email address after signing in
- Verify their email address via another OTP challenge
- Input their first and last name
Email OTP
Email OTP is an additional authentication method which the user can choose to sign in with.- Input their phone number after signing in
- Verify their phone number via another OTP challenge
- Input their first and last name
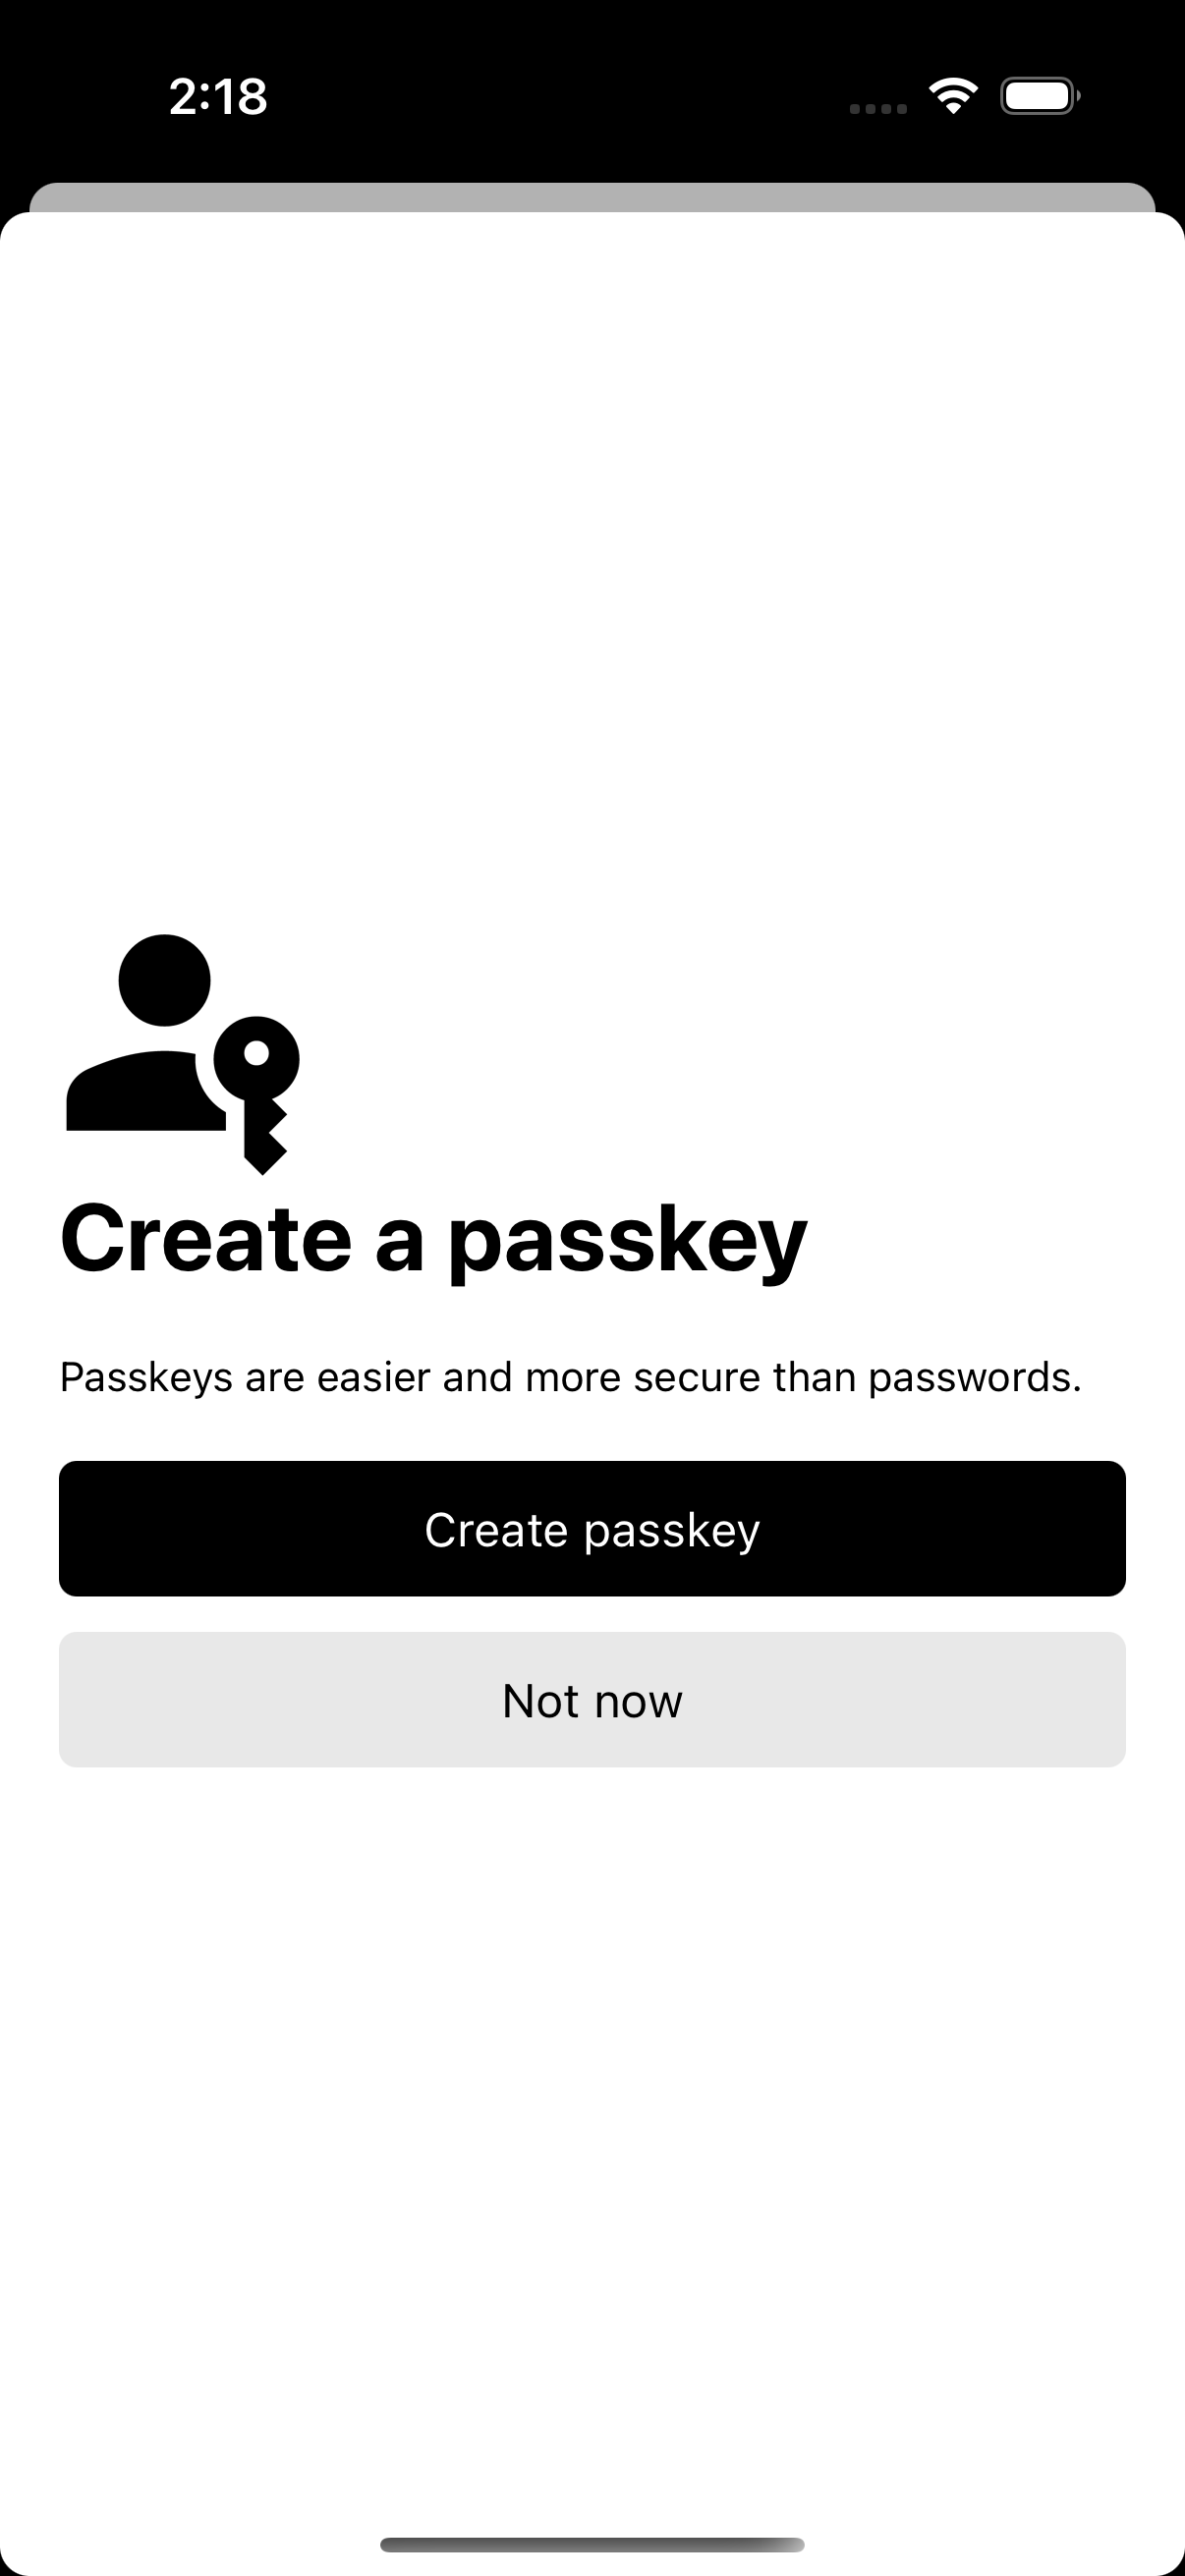
Passkey
In our example app, a passkey can only be created after both phone number and email have been verified.