Configuration
From the top right menu, navigate to Organization settings > SSO to access your SAML 2.0 configuration.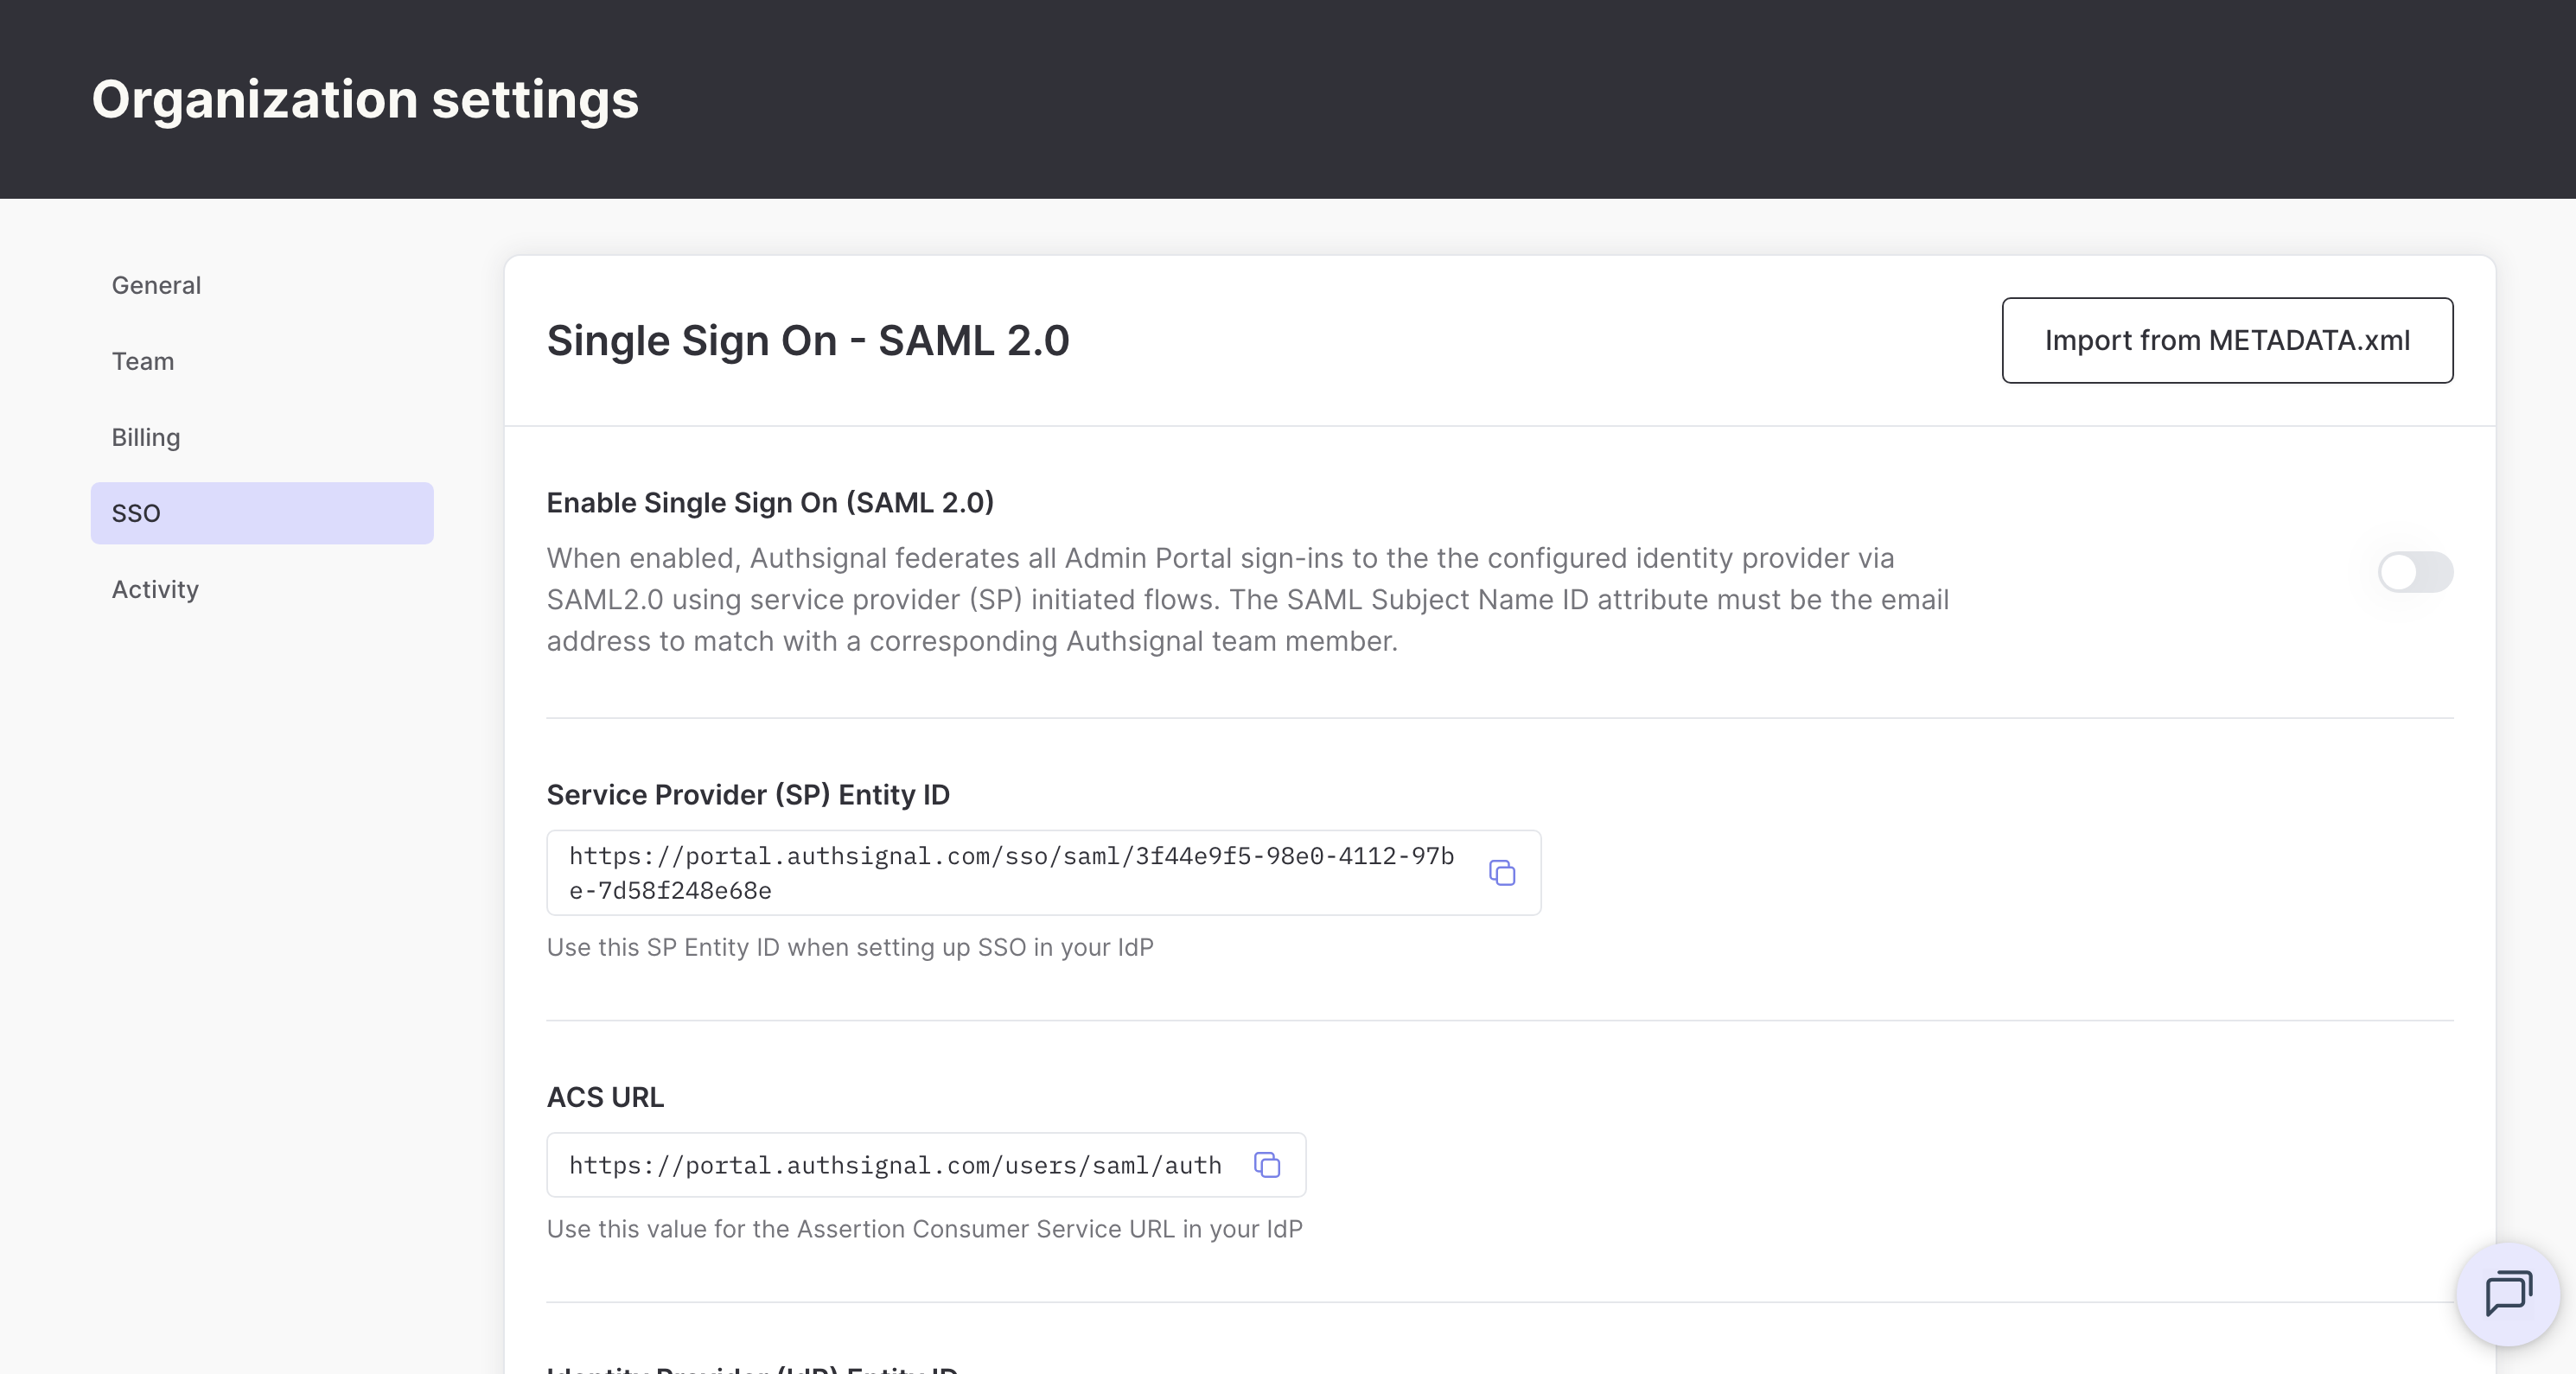
Import from metadata
If your identity provider provides a metadata XML file, you can automatically populate your SSO configuration.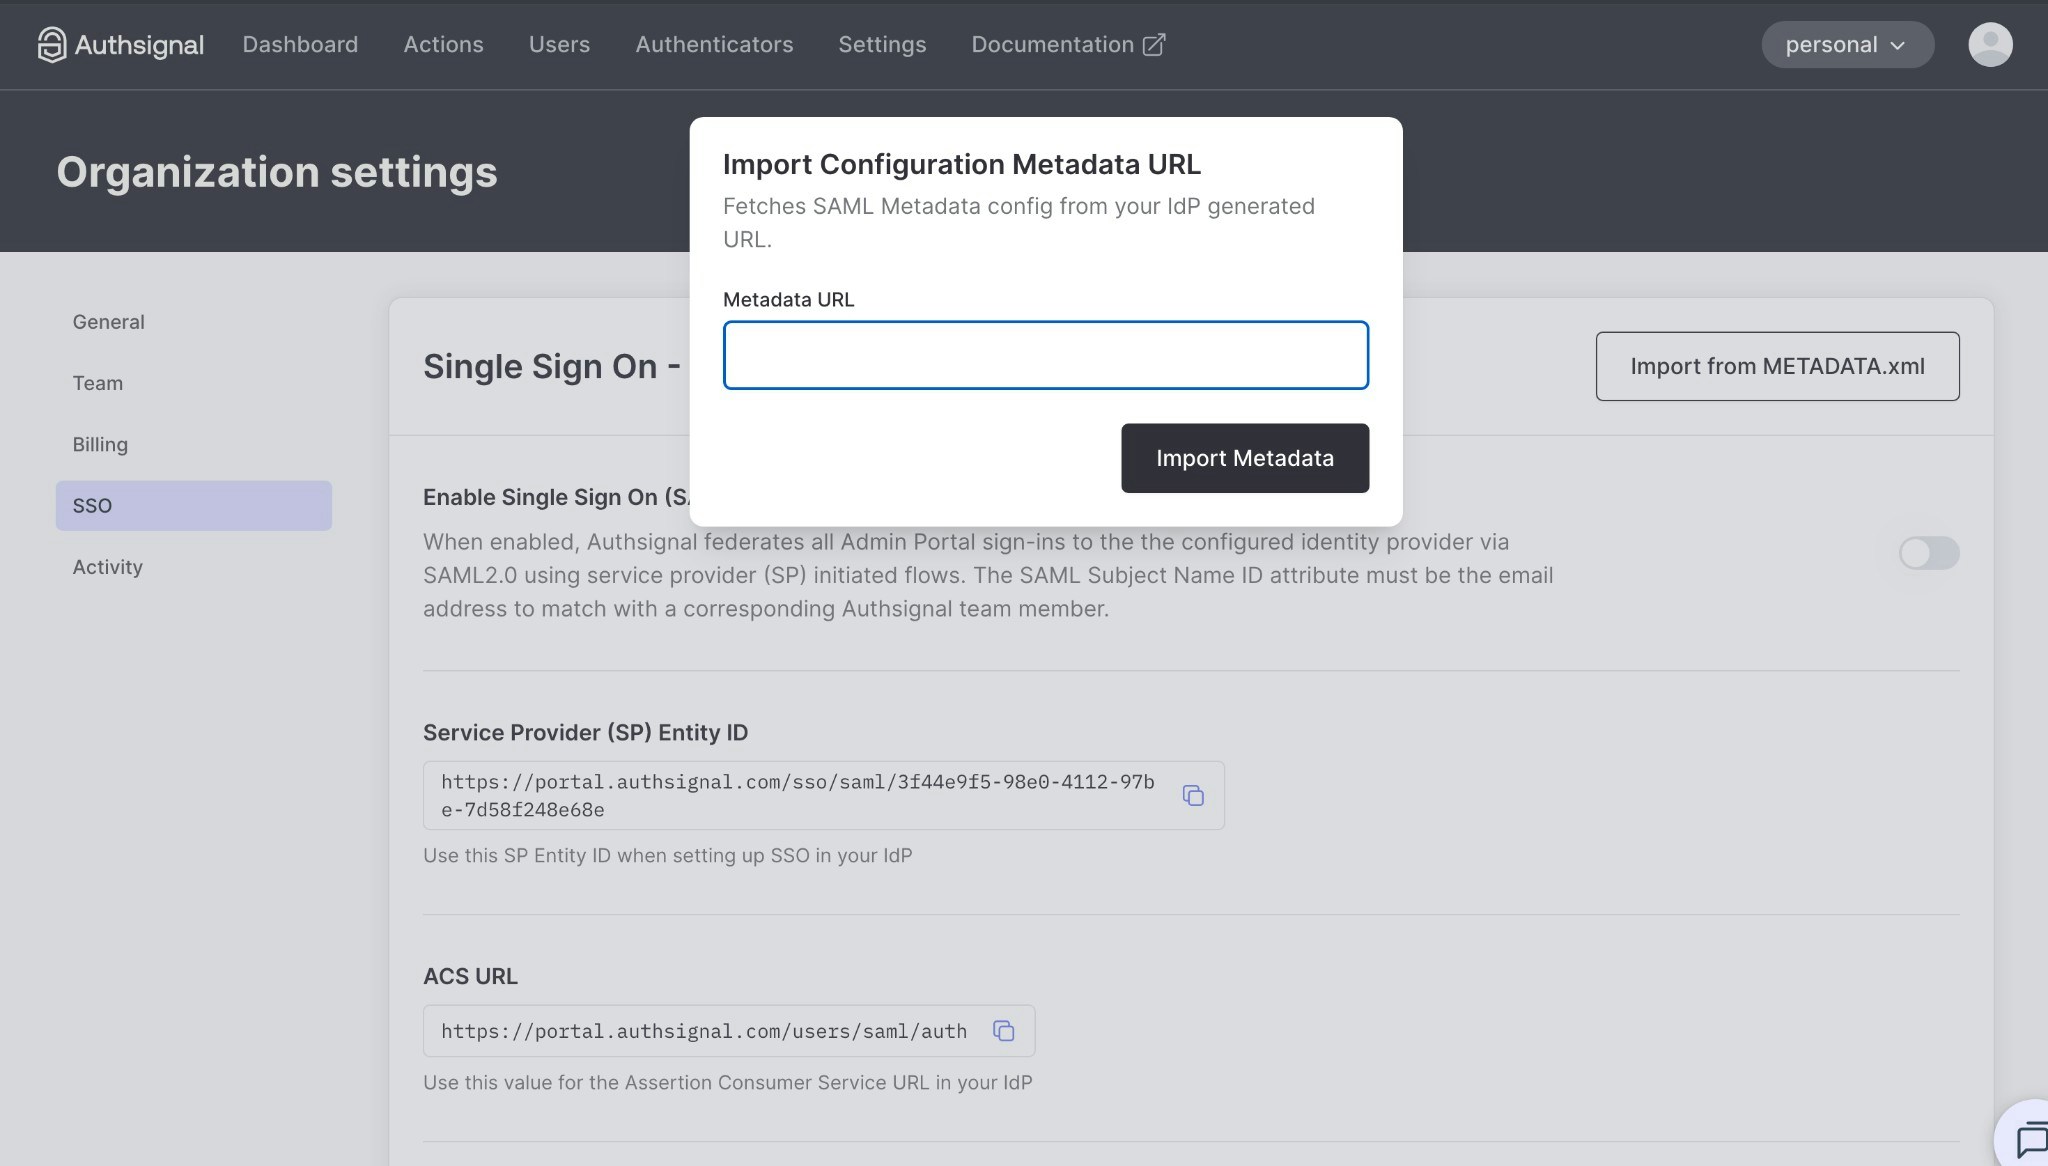
- Click Import from METADATA.xml
- Enter your identity provider’s metadata URL
- Click Import Metadata
Manual configuration
Alternatively, you can manually configure SSO by following these steps:Get your service provider details
You’ll need the following values to configure SSO in your identity provider: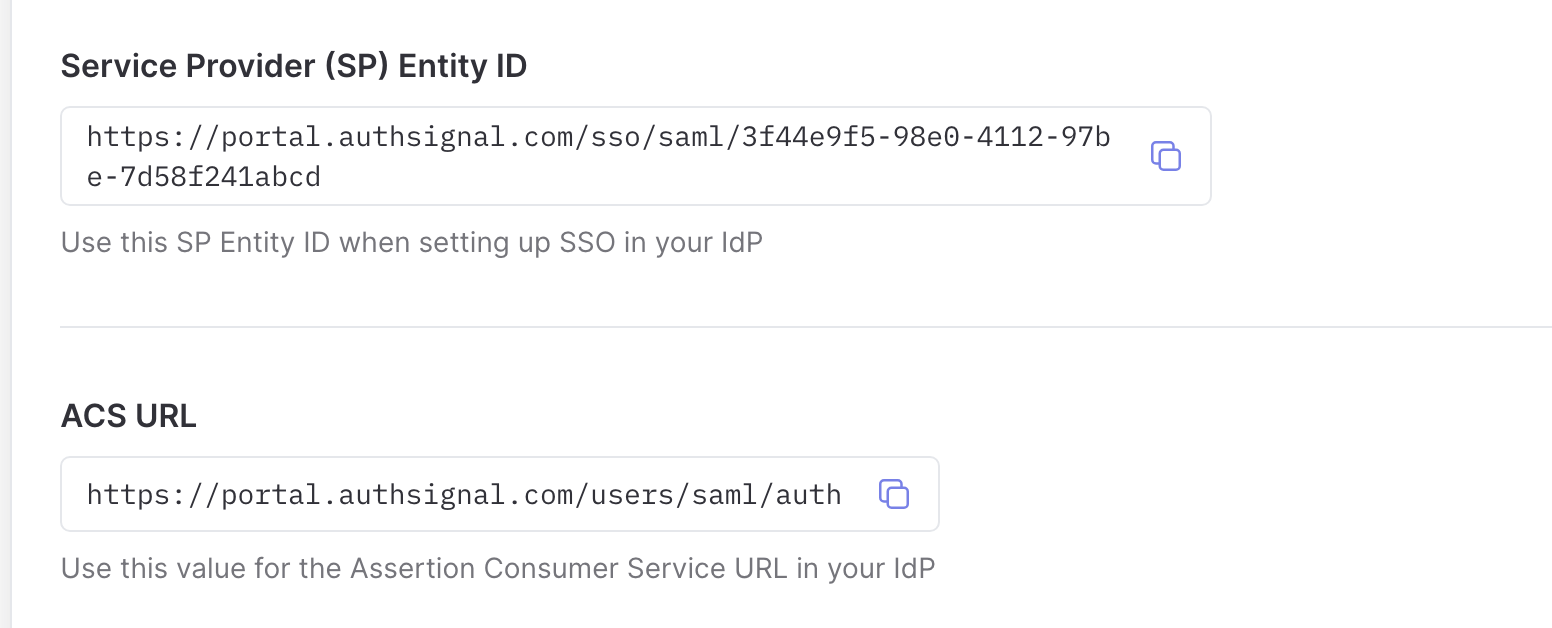
Configure your identity provider
Configure SAML 2.0 in your identity provider using the service provider details above.Key configuration requirements:
- Entity ID / Audience: Use the SP Entity ID
- ACS URL / Reply URL: Use the ACS URL
- Name ID format: Email address
- Name ID value: User’s email address
The specific configuration steps will vary depending on your identity provider. See your IdP’s documentation for detailed instructions on adding a SAML application.
Configure Authsignal
Once you’ve configured your identity provider, provide the following information in the Authsignal admin portal:Identity provider (IdP) entity IDYour identity provider’s generated entity ID. This is typically a URL that uniquely identifies your IdP.Identity provider (IdP) SSO target URLYour identity provider’s SSO target URL that will receive SAML requests. This is sometimes called the “Single Sign-On URL” or “SAML 2.0 Endpoint”.Identity provider (IdP) public x509 certificateYour identity provider’s public x509 certificate used to verify SAML responses.
Enable single sign-on
Once you’ve configured your SSO settings (either via metadata import or manual configuration), enable the Enable Single Sign On (SAML 2.0) toggle to activate SSO.