Authsignal provides multiple ways to enroll users with authentication methods. Choose the approach that best fits your implementation:
Security Note: If users already have enrolled authenticators, enrolling additional methods requires strong authenticator binding to prevent MFA bypass attacks.

Using the pre-built UI

The Authsignal pre-built UI provides a complete enrollment experience with minimal integration effort.

First-time enrollment

When users have no existing authenticators, they can enroll their first method directly. Backend: Generate enrollment URL
const request = {
  userId: "dc58c6dc-a1fd-4a4f-8e2f-846636dd4833",
  action: "enroll",
  attributes: {
    redirectUrl: "https://yourapp.com/callback",
  },
};

const response = await authsignal.track(request);

const url = response.url;
Frontend: Launch enrollment flow
authsignal.launch(url);

First-time enrollment with email OTP

Check enrollment status using Get User or Get Authenticators to customize your UI based on whether users are enrolled.

Adding additional authenticators

Users can enroll additional methods through the pre-built UI by first completing a challenge with one of their existing methods. We can add the redirectToSettings attribute to the track request to land the user on a screen after their challenge which will let them enroll more methods.
const request = {
  userId: "dc58c6dc-a1fd-4a4f-8e2f-846636dd4833",
  action: "manageAuthenticators",
  attributes: {
    redirectUrl: "https://yourapp.com/callback"
    redirectToSettings: true,
  },
};

const response = await authsignal.track(request);

const url = response.url;
If a user has previously enrolled email OTP, for example, then they can complete an email OTP challenge in order to enroll passkey as another authentication option.

Adding a passkey after email OTP verification

This security requirement ensures strong binding between authenticators, preventing attackers from adding new methods if they compromise a single factor.

Enrolling email and SMS authenticators

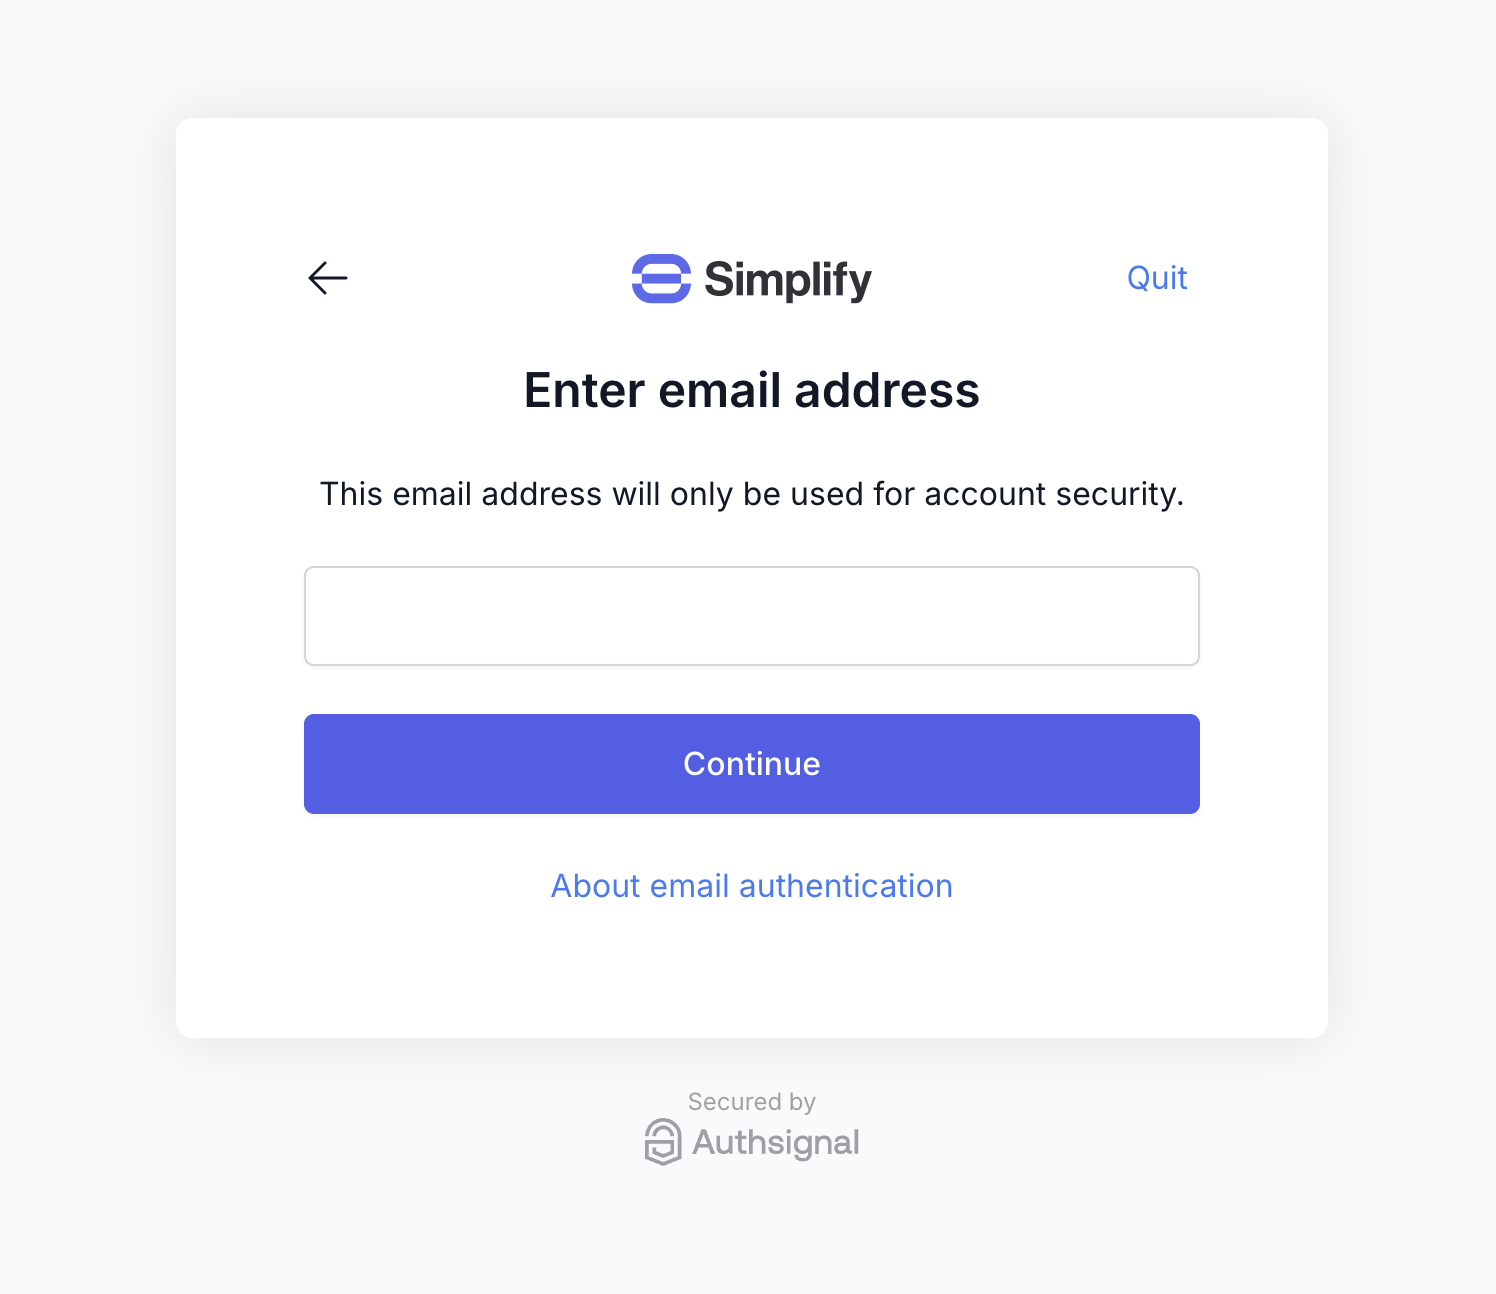
By default Authsignal’s pre-built UI requires users to enter their email address or phone number when enrolling an email or SMS-based authenticator.

Capturing a user's email address to enroll an OTP authenticator

If you’ve already captured the user’s email in your own system, however, then you can skip this step by passing the user’s email or phone number in the track request.
const request = {
  userId: "dc58c6dc-a1fd-4a4f-8e2f-846636dd4833",
  action: "enroll",
  attributes: {
    redirectUrl: "https://yourapp.com/callback",
    email: "jane@authsignal.com",
  },
};

const response = await authsignal.track(request);
This will skip the email or phone number input step during enrollment, but still allow the user to edit the value later. If you wish to prevent the user from editing the value, this can be configured in the Authsignal Portal by disabling the self-service management setting on the relevant authenticator configuration. Additionally, if you’re already verified the user’s email in your own system then you can programmatically enroll them with an email or SMS authenticator at an appropriate point in your app (e.g. during a registration flow).

Using Client SDKs

Client SDKs offer complete control over the enrollment experience, ideal for native mobile apps or custom web interfaces.

First-time enrollment flow

1. Backend: Generate enrollment token
const request = {
  userId: "dc58c6dc-a1fd-4a4f-8e2f-846636dd4833",
  action: "enroll",
};

const response = await authsignal.track(request);

const token = response.token;
2. Frontend: Use Client SDK
authsignal.setToken("eyJhbGciOiJ...");

// Send the user an email OTP code
// You can call this multiple times via a 'resend' button
await authsignal.email.enroll({ email: "jane@authsignal.com" });

// Verify the inputted code matches the original code
const response = await authsignal.email.verify({ code: "123456" });

Adding additional authenticators

1. Backend: Generate token with additional scope
// Track action to generate token for passkey enrollment
const request = {
  userId: "dc58c6dc-a1fd-4a4f-8e2f-846636dd4833",
  action: "enroll-passkey",
  attributes: {
    scope: "add:authenticators",
  },
};

const response = await authsignal.track(request);
const token = response.token; // Pass this to frontend
2. Frontend: Enroll new method
const { data, error } = await authsignal.passkey.signUp({ 
  token: tokenFromBackend, // Token from step 1
  username: user.email,    // User's email or username
});

if (error) {
  console.error("Passkey enrollment failed:", error);
} else {
  console.log("Passkey enrolled successfully");
  // Continue with your app flow
}
The "add:authenticators" scope should only be granted after the user has been strongly authenticated.

Alternative enrollment methods

Programmatic enrollment

For users whose email/phone is already verified in your system, you can enroll them directly without requiring user interaction:
const request = {
  userId: "dc58c6dc-a1fd-4a4f-8e2f-846636dd4833",
  attributes: {
    verificationMethod: VerificationMethod.SMS,
    phoneNumber: "+64270000000",
  },
};

const response = authsignal.enrollVerifiedAuthenticator(request);
Supported verification methods:
  • EMAIL_OTP - Email-based one-time passwords
  • EMAIL_MAGIC_LINK - Email magic links
  • SMS - SMS-based one-time passwords
This method assumes verification has already occurred and doesn’t send verification messages. Only use this if you’ve verified the user’s contact information in your own system.

Next steps