Learn how Authsignal rules enable risk-based authentication and how to implement them in your app.
Authsignal’s rules engine transforms static authentication flows into intelligent, risk-based security systems. Rules determine when and how to challenge users based on contextual factors.Rules are conditional statements that evaluate the context of each action to make intelligent security decisions. While actions define what users are doing, rules determine when and how to challenge them based on risk factors, device characteristics, user behavior, and custom business data.
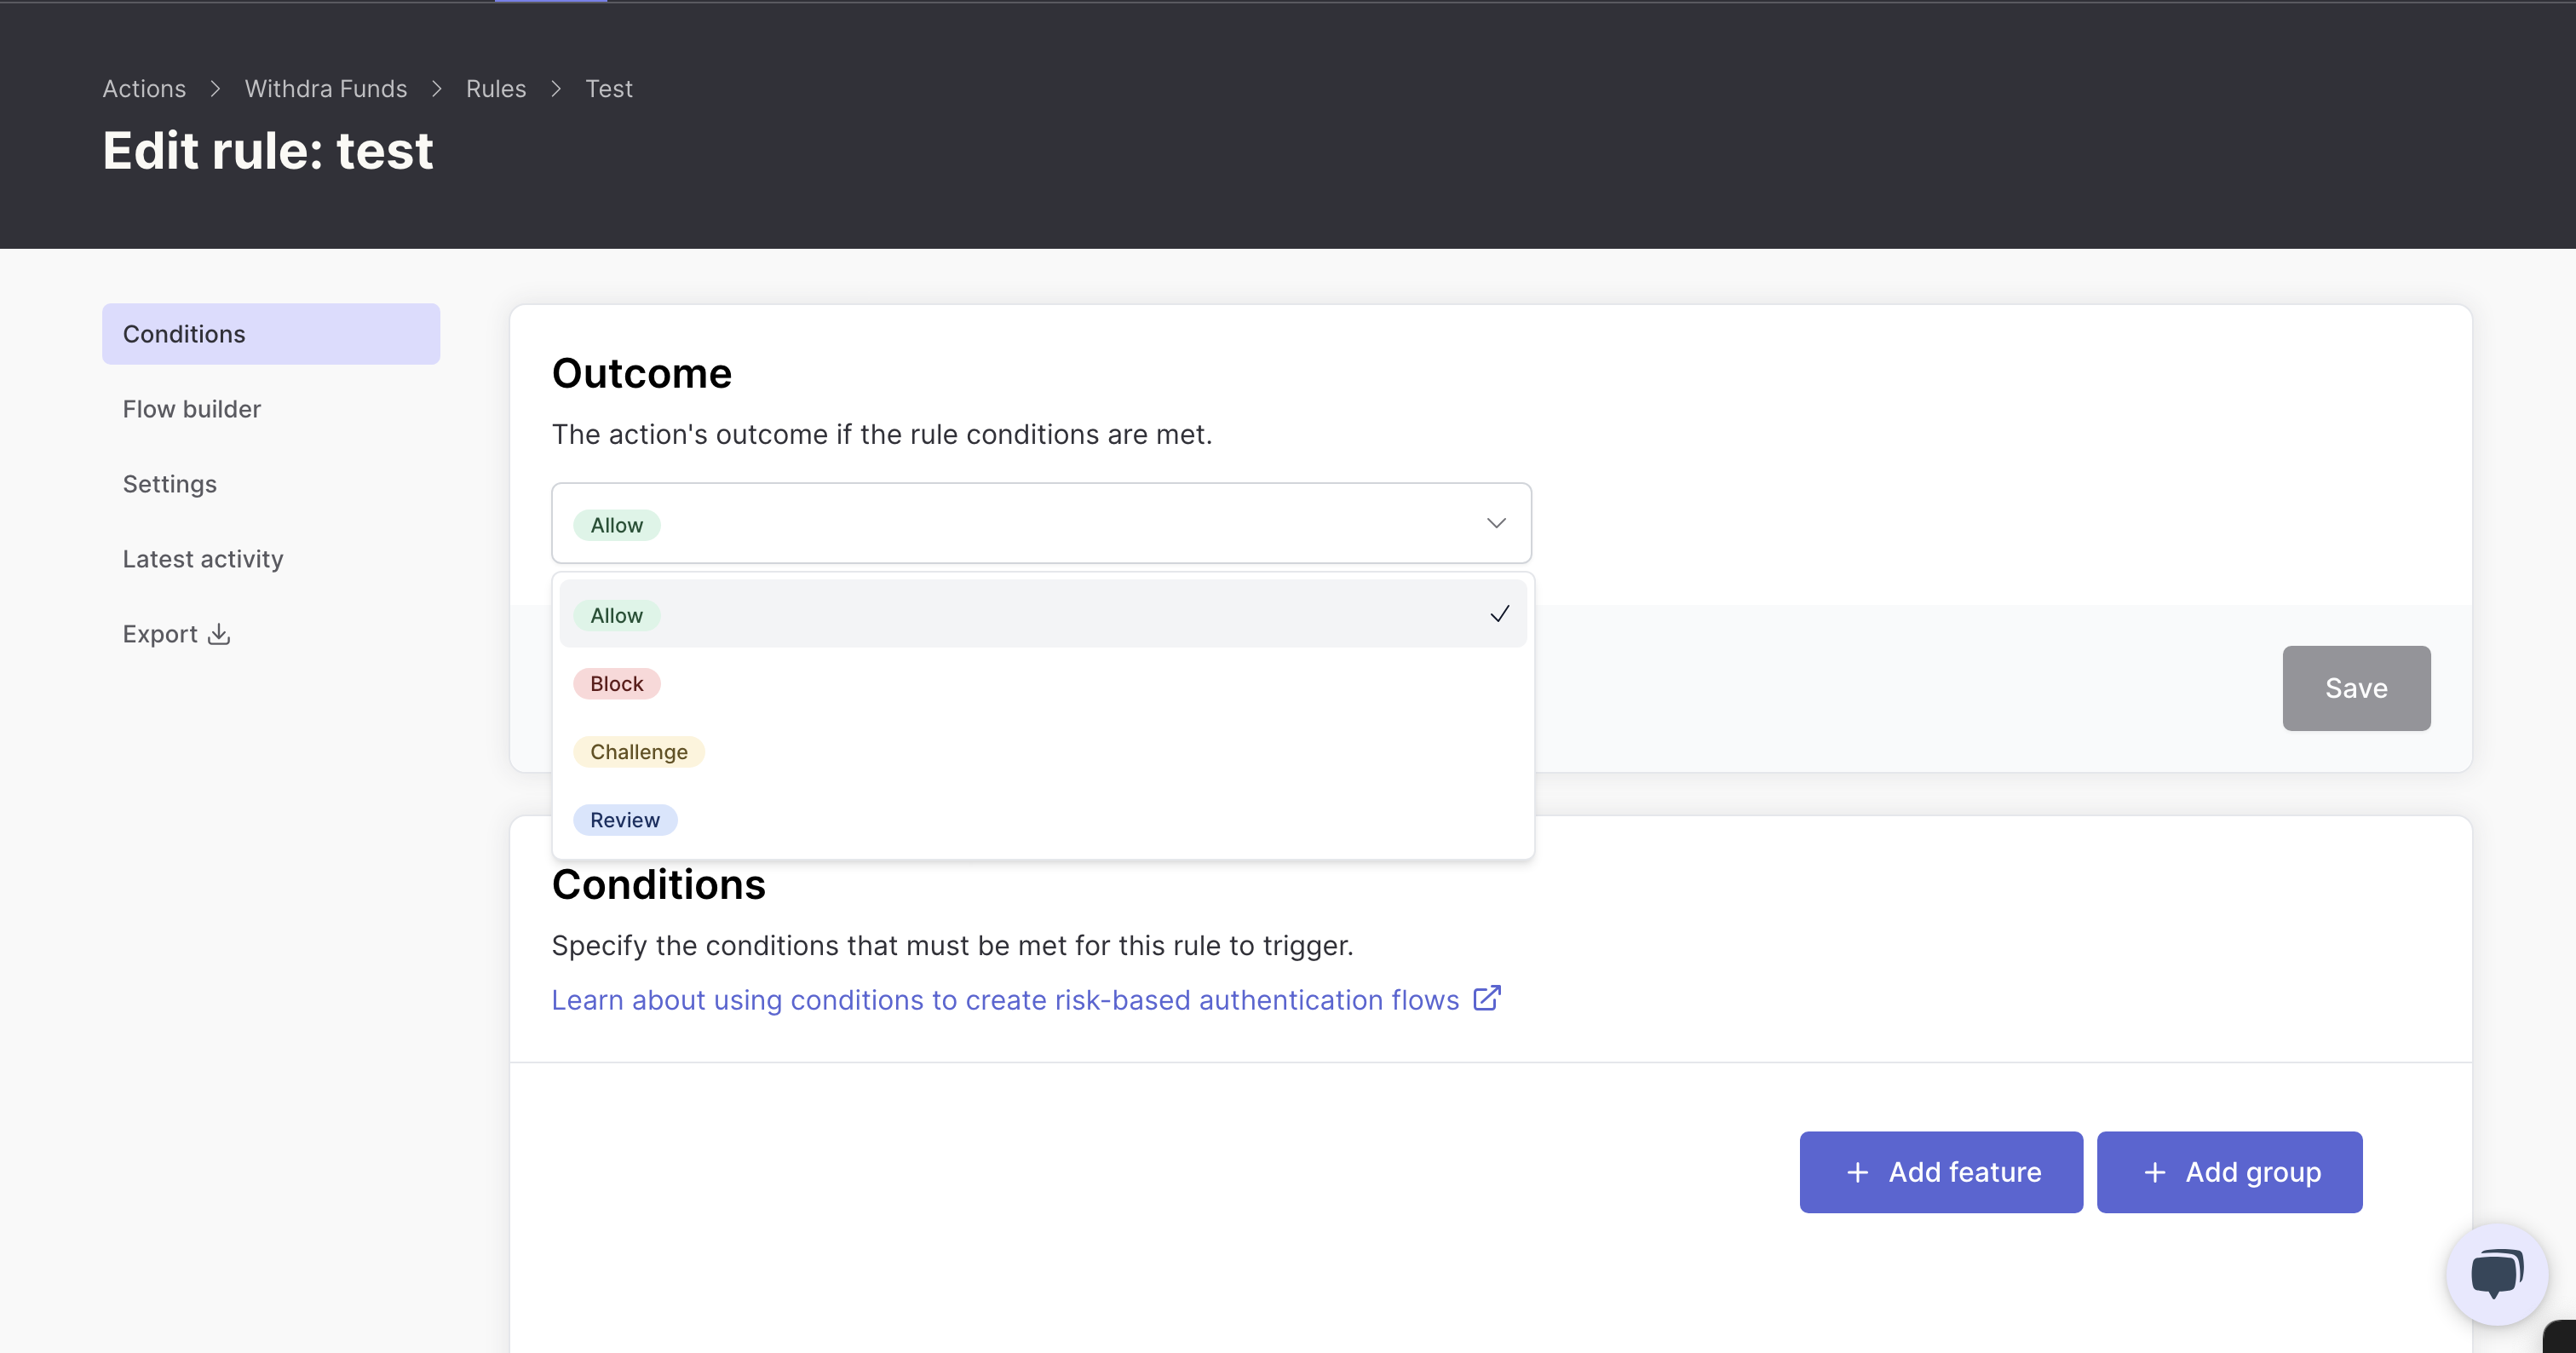
When you create a rule in Authsignal, you’re defining the logic that determines when additional security measures are required. Here’s what a rule contains:
When a rule’s conditions are met, it can override the action’s default outcome with any of the four available action outcomes (ALLOW, CHALLENGE, REVIEW, or BLOCK). This allows you to apply outcomes dynamically based on risk assessment rather than using a static default.
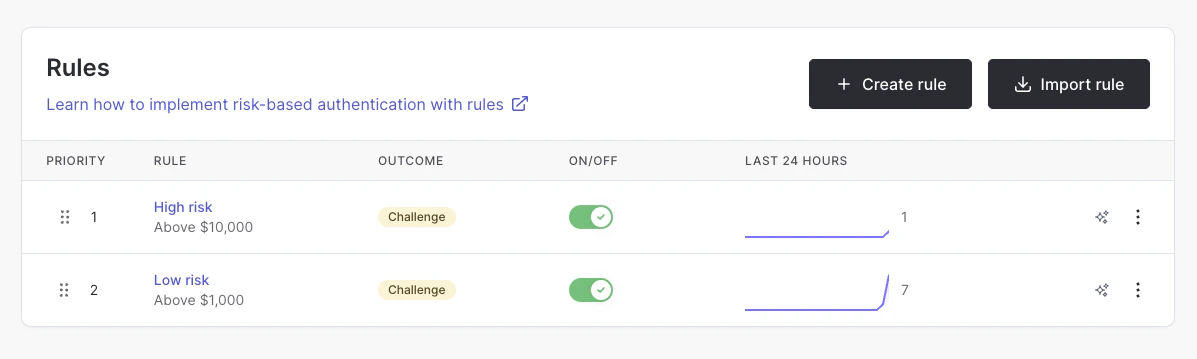
When multiple rules are defined for an action, they are evaluated in priority order. Each rule is assigned a priority number, with lower numbers indicating higher priority.
All rules are evaluated against the action’s context, and if multiple rules match, the highest-priority rule’s outcome is used. If no rules match, the action’s default outcome is used.You can reorder rules by dragging them in the rules list to adjust their priority. Place your most specific or highest-risk rules at the top to ensure they take precedence over broader rules.
For example, if you have a “High risk” rule (priority 1) that challenges transactions above $10,000, and a “Low risk” rule (priority 2) that challenges transactions above $1,000, a $15,000 transaction will match both rules, but the “High risk” rule’s outcome will be used because it has a higher priority.
Rules work seamlessly with your existing action tracking. When you track an action, Authsignal evaluates all applicable rules and returns the appropriate outcome.
Custom UI
Pre-built UI
// Track an action - rules are evaluated automaticallyconst result = await authsignal.track({ userId: "0272c312-e181-4cad-a494-43647b503a0a", action: "withdraw-funds", attributes: { deviceId: "555c17e1-3837-4f13-81bb-131e5597e168", ipAddress: "203.0.113.42", userAgent: "Mozilla/5.0 (Windows NT 10.0; Win64; x64) AppleWebKit/537.36" }});// Handle the result based on rule evaluationif (result.state === "CHALLENGE_REQUIRED") { // Rule determined a challenge is needed return { token: result.token // For custom UI with SDKs };} else if (result.state === "ALLOW") { // Rule determined user is trusted return { success: true };} else if (result.state === "REVIEW") { // Rule determined manual review is needed return { status: "under_review", message: "Your request is being reviewed" };} else if (result.state === "BLOCK") { // Rule determined this is high-risk return { error: "This action has been blocked for security reasons" };}
// Track an action - rules are evaluated automaticallyconst result = await authsignal.track({ userId: "0272c312-e181-4cad-a494-43647b503a0a", action: "withdraw-funds", attributes: { deviceId: "555c17e1-3837-4f13-81bb-131e5597e168", ipAddress: "203.0.113.42", userAgent: "Mozilla/5.0 (Windows NT 10.0; Win64; x64) AppleWebKit/537.36", redirectUrl: "https://yourapp.com/callback" }});// Handle the result based on rule evaluationif (result.state === "CHALLENGE_REQUIRED") { // Rule determined a challenge is needed return { url: result.url // For pre-built UI };} else if (result.state === "ALLOW") { // Rule determined user is trusted return { success: true };} else if (result.state === "REVIEW") { // Rule determined manual review is needed return { status: "under_review", message: "Your request is being reviewed" };} else if (result.state === "BLOCK") { // Rule determined this is high-risk return { error: "This action has been blocked for security reasons" };}
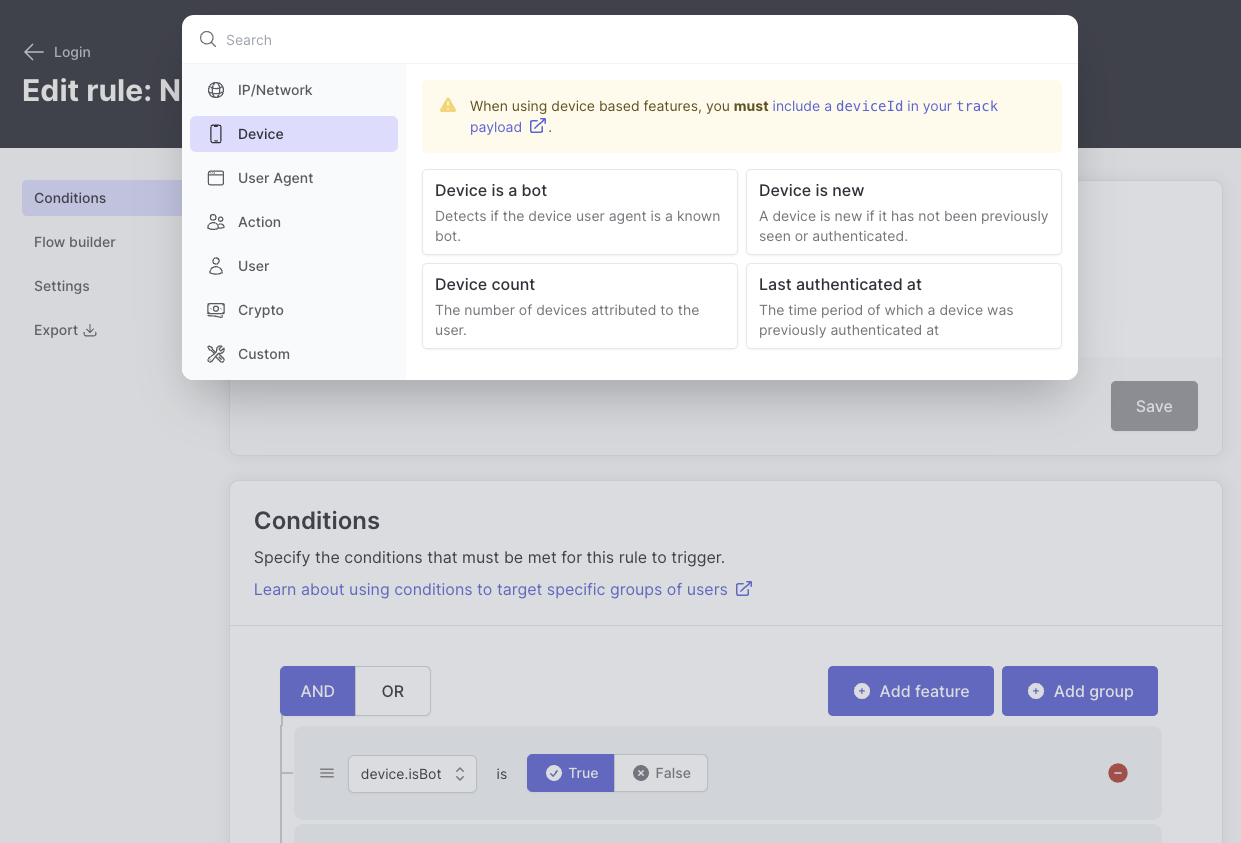
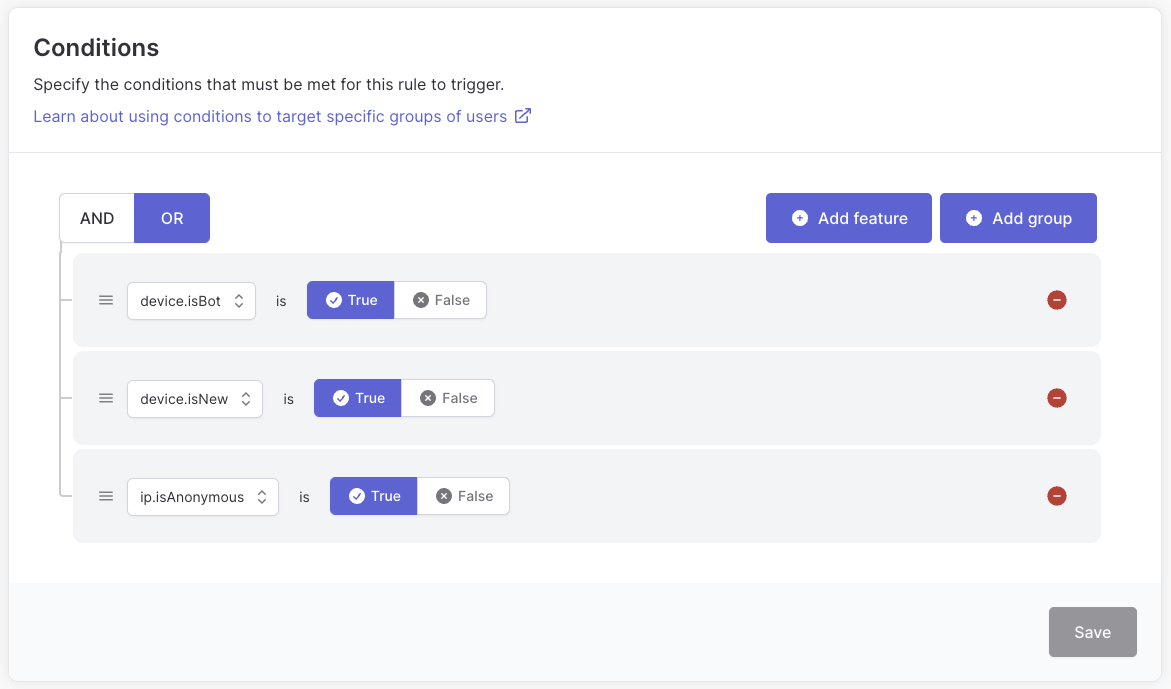
Let’s walk through creating a practical rule that automatically challenges high-risk users while allowing trusted users to access your application seamlessly.
Now that you have created the rule, you’ll need to update your track action call to include some additional fields: deviceId, ipAddress, and userAgent.
Custom UI
Pre-built UI
const request = { userId: "dc58c6dc-a1fd-4a4f-8e2f-846636dd4833", action: "signIn", attributes: { deviceId: "555c17e1-3837-4f13-81bb-131e5597e168", // From __as_aid cookie if using Authsignal Web SDK userAgent: "Mozilla/5.0 (Windows NT 10.0; Win64; x64) AppleWebKit/537.36", ipAddress: "203.0.113.42" }};const response = await authsignal.track(request);// Handle the responseif (response.state === "CHALLENGE_REQUIRED") { // Use token with client SDK return { token: response.token };} else if (response.state === "ALLOW") { // User is trusted, proceed return { success: true };}
const request = { userId: "dc58c6dc-a1fd-4a4f-8e2f-846636dd4833", action: "signIn", attributes: { deviceId: "555c17e1-3837-4f13-81bb-131e5597e168", // From __as_aid cookie if using Authsignal Web SDK userAgent: "Mozilla/5.0 (Windows NT 10.0; Win64; x64) AppleWebKit/537.36", ipAddress: "203.0.113.42", redirectUrl: "https://yourapp.com/callback" }};const response = await authsignal.track(request);// Handle the responseif (response.state === "CHALLENGE_REQUIRED") { // Redirect to pre-built UI return { url: response.url };} else if (response.state === "ALLOW") { // User is trusted, proceed return { success: true };}
Note: When using the Authsignal Web SDK, you can obtain the deviceId from the __as_aid cookie that’s automatically created on the client side.