React
Learn how to use the Authsignal React SDK.
The Authsignal React SDK builds on top of the Web SDK by providing UI components which can be added to your React app.
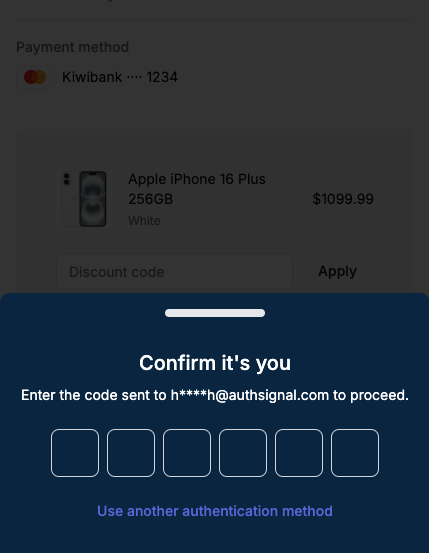
An example of the UI components in a checkout flow.
Installation
AuthsignalProvider component
The AuthsignalProvider
component allows you to use the useAuthsignal hook. Render the AuthsignalProvider
component
at the root of your application so that it is available everywhere you need it.
import { AuthsignalProvider } from "@authsignal/react";
import { Checkout } from "./Checkout";
export function App() {
return (
<AuthsignalProvider tenantId="{{TENANT_ID}}" baseUrl="{{BASE_URL}}">
<Checkout />
</AuthsignalProvider>
);
}
The AuthsignalProvider
component accepts the following props:
Your tenant ID. It can be found in the API keys section.
Your tenant’s base URL. It can be found in the API keys section.
Customize the design of the UI components.
useAuthsignal hook
The useAuthsignal
hook returns two functions, startChallenge
and startChallengeAsync
, that you can use to
trigger the authentication flow.
Both functions require a token
to be passed as an argument. The token
should be
returned by your server after tracking an action.
startChallenge
The startChallenge
function triggers the authentication flow.
import { useAuthsignal } from "@authsignal/react";
export function Checkout() {
const { startChallenge } = useAuthsignal();
const handlePayment = async () => {
const response = await fetch("/api/payment", {
method: "POST",
headers: {
"Content-Type": "application/json",
},
});
const data = await response.json();
if (data.token) {
startChallenge({
token: data.token,
onChallengeSuccess: ({ token }) => {
// Challenge was successful
// Send the token to your server to validate the challenge
},
onCancel: () => {
// User cancelled the challenge
},
onTokenExpired: () => {
// Token expired
},
});
}
};
return (
<div>
<button type="button" onClick={handlePayment}>
Pay
</button>
</div>
);
}
As well as a token
, the startChallenge
function accepts the following callbacks:
A callback function that is called when the challenge is successful. It receives an object with a
token
property. This token
should be sent to your server to validate the
challenge.
A callback function that is called when the user cancels the challenge.
A callback function that is called when the token expires.
startChallengeAsync
Alternatively, you can use the startChallengeAsync
function, which returns a Promise
that resolves with a token
when the challenge is successful.
It will throw a ChallengeError
if the user cancels the challenge or the token expires.
import { useAuthsignal, ChallengeError } from "@authsignal/react";
export function Checkout() {
const { startChallengeAsync } = useAuthsignal();
const handlePayment = async () => {
const response = await fetch("/api/payment", {
method: "POST",
headers: {
"Content-Type": "application/json",
},
});
const data = await response.json();
if (data.token) {
try {
const { token } = await startChallengeAsync({
token: data.token,
});
// Challenge was successful
// Send the token to your server to validate the challenge
} catch (e) {
if (e instanceof ChallengeError) {
if (e.code === "USER_CANCELED") {
// User cancelled the challenge
} else if (e.code === "TOKEN_EXPIRED") {
// Token expired
}
}
}
}
};
return (
<div>
<button type="button" onClick={handlePayment}>
Pay
</button>
</div>
);
}
Customizing the appearance
You can customize the appearance of the UI components by passing an appearance
prop to the AuthsignalProvider component.
import { AuthsignalProvider } from "@authsignal/react";
import { Checkout } from "./Checkout";
export function App() {
return (
<AuthsignalProvider
tenantId="{{TENANT_ID}}"
baseUrl="{{BASE_URL}}"
appearance={{
variables: {
borderRadius: "0.5rem",
colorBackground: "#0A2540",
colorPrimary: "#EFC078",
colorPrimaryForeground: "#1A1B25",
colorForeground: "white",
},
}}
>
<Checkout />
</AuthsignalProvider>
);
}