> ## Documentation Index
> Fetch the complete documentation index at: https://docs.authsignal.com/llms.txt
> Use this file to discover all available pages before exploring further.
# Palm Biometrics & Verification Enrollment
> An overview on how to integrate enrollment flows
## Identifying users for palm enrollment
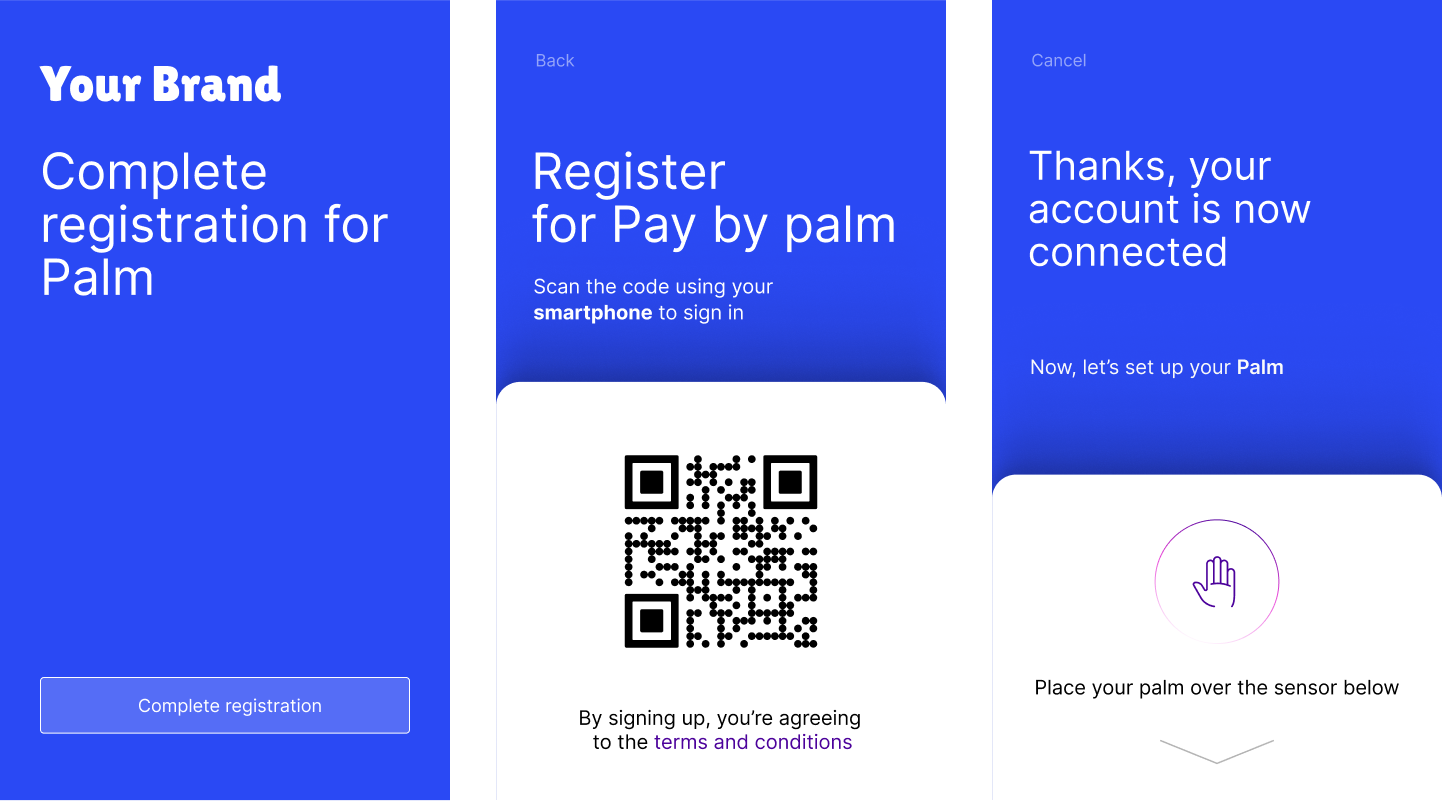
For users to enroll their palms, they must first identify themselves on the terminal so that the palm biometrics signature can be linked to the right user.
This is done by the user completing a challenge which is initiated by the terminal. Users will scan a QR code using their own device to complete the challenge.
The challenge can be completed using any of our authentication options such as Email OTP, SMS OTP, TOTP, or passkey using our [pre-built UI](/implementation-options/prebuilt-ui/overview) or [custom UI](/implementation-options/web-sdk/overview).
You can also use our [Mobile SDK for push verification](/sdks/client/mobile/push-verification) in your mobile app.
Authsignal’s terminal application will initiate the enrollment process. You will need to implement the method of completing a challenge for palm enrollment. This is outlined in Step 1.A
Configure decision webhooks, and action code
Build out customer identification and authentication flows
 # Step 1: Pre-requisites
## A. Provide Authsignal a Terminal URL
Please provide Authsignal a terminal URL that the QR code will display, with a `challengeId` and `action` added as a param i.e., `https://your-domain.com/login?challengeId=&action=`
This will allow you to integrate the user’s identification process on the terminal, directly in your own web or mobile application.
Challenges initiated by the terminal are valid for 10 minutes by default. Users will need to
identify themselves within this 10 minute window.
## B. Provide Authsignal a Terminal action code and webhook URL
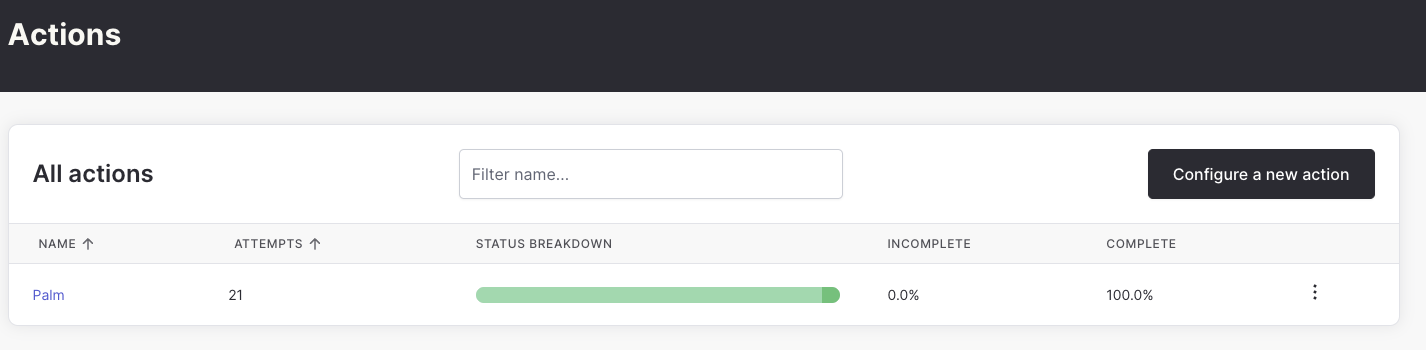
Please provide Authsignal with a preferred action code for your terminal and a corresponding webhook url that will receive events upon successful verification of users.
A terminal will have a single Authsignal action associated with it.
Each action can have a webhook configured such that each time a verification occurs the webhook is called. Custom logic can be performed on the webhook as part of the verification process.
Examples include, checking membership status, collecting payments, or calling other APIs.
# Step 1: Pre-requisites
## A. Provide Authsignal a Terminal URL
Please provide Authsignal a terminal URL that the QR code will display, with a `challengeId` and `action` added as a param i.e., `https://your-domain.com/login?challengeId=&action=`
This will allow you to integrate the user’s identification process on the terminal, directly in your own web or mobile application.
Challenges initiated by the terminal are valid for 10 minutes by default. Users will need to
identify themselves within this 10 minute window.
## B. Provide Authsignal a Terminal action code and webhook URL
Please provide Authsignal with a preferred action code for your terminal and a corresponding webhook url that will receive events upon successful verification of users.
A terminal will have a single Authsignal action associated with it.
Each action can have a webhook configured such that each time a verification occurs the webhook is called. Custom logic can be performed on the webhook as part of the verification process.
Examples include, checking membership status, collecting payments, or calling other APIs.
 [Palm biometrics decision webhook event schema documentation](/palm-biometrics/webhooks)
# Enrollment sequence
```mermaid theme={null}
sequenceDiagram
participant U as User/Mobile App
participant T as Android Terminal
participant B as Your backend
participant A as Authsignal
participant W as Your webhook end-point
Note over T: Display QR code (challengeId)
T->>U: Scans QR Code
Note over U: Perform Authentication (Passkeys, Device Signing)
U->>B: Sends challengeId in an authenticated context
B->>A: Track action
A->>W: Palm Biometrics Webhook Event
Note over W: Perform decision and business logic
W->>A: Respond with decision and custom messaging
A->>T: Return wth start enrollment
Note over T: Begin user palm enrollment user experience
```
# Step 2: User to complete the challenge
For the user to complete the challenge, they will scan the QR code on the terminal which encodes the challengeId and redirects them to your own login page.
To provide the best user experience, it's important to maintain consistency in the allowed
authenticators across different integration modes.
## Option 1: Using the pre-built UI
The instructions are the same as in the following guide: [https://docs.authsignal.com/implementation-options/prebuilt-ui/overview](https://docs.authsignal.com/implementation-options/prebuilt-ui/overview)
However, in step 1 of the guide above [instead of using our server SDKs for calling the Track API you should call it directly](/api-reference/server-api/track-action),
where the `challengeId` in accepted in the request body (not documented). This would have the user complete the challenge initiated by the terminal, instead of creating a new challenge.
The `action` must be the same as the action set on step 1.B.
## Option 2: Using your own web based UI
The instructions are the same as in the following guide: [https://docs.authsignal.com/implementation-options/web-sdk/overview](https://docs.authsignal.com/implementation-options/web-sdk/overview)
The `challengeId` should be added to the track request.
The `action` must be the same as the action set on step 1.B.
## Option 3: Using your mobile app
1. Add a device credential
* [https://docs.authsignal.com/authentication-methods/push-notification#2-mobile-app-add-device-credential](https://docs.authsignal.com/authentication-methods/push-notification#2-mobile-app-add-device-credential)
2. Extract the challengeId from the QR code
3. Approving the challenge
* [https://docs.authsignal.com/authentication-methods/qr-code#4-mobile-app-approve-or-decline-the-challenge](https://docs.authsignal.com/authentication-methods/qr-code#4-mobile-app-approve-or-decline-the-challenge)
This documentation is built and hosted on [Mintlify](https://mintlify.com), a developer documentation platform.
[Palm biometrics decision webhook event schema documentation](/palm-biometrics/webhooks)
# Enrollment sequence
```mermaid theme={null}
sequenceDiagram
participant U as User/Mobile App
participant T as Android Terminal
participant B as Your backend
participant A as Authsignal
participant W as Your webhook end-point
Note over T: Display QR code (challengeId)
T->>U: Scans QR Code
Note over U: Perform Authentication (Passkeys, Device Signing)
U->>B: Sends challengeId in an authenticated context
B->>A: Track action
A->>W: Palm Biometrics Webhook Event
Note over W: Perform decision and business logic
W->>A: Respond with decision and custom messaging
A->>T: Return wth start enrollment
Note over T: Begin user palm enrollment user experience
```
# Step 2: User to complete the challenge
For the user to complete the challenge, they will scan the QR code on the terminal which encodes the challengeId and redirects them to your own login page.
To provide the best user experience, it's important to maintain consistency in the allowed
authenticators across different integration modes.
## Option 1: Using the pre-built UI
The instructions are the same as in the following guide: [https://docs.authsignal.com/implementation-options/prebuilt-ui/overview](https://docs.authsignal.com/implementation-options/prebuilt-ui/overview)
However, in step 1 of the guide above [instead of using our server SDKs for calling the Track API you should call it directly](/api-reference/server-api/track-action),
where the `challengeId` in accepted in the request body (not documented). This would have the user complete the challenge initiated by the terminal, instead of creating a new challenge.
The `action` must be the same as the action set on step 1.B.
## Option 2: Using your own web based UI
The instructions are the same as in the following guide: [https://docs.authsignal.com/implementation-options/web-sdk/overview](https://docs.authsignal.com/implementation-options/web-sdk/overview)
The `challengeId` should be added to the track request.
The `action` must be the same as the action set on step 1.B.
## Option 3: Using your mobile app
1. Add a device credential
* [https://docs.authsignal.com/authentication-methods/push-notification#2-mobile-app-add-device-credential](https://docs.authsignal.com/authentication-methods/push-notification#2-mobile-app-add-device-credential)
2. Extract the challengeId from the QR code
3. Approving the challenge
* [https://docs.authsignal.com/authentication-methods/qr-code#4-mobile-app-approve-or-decline-the-challenge](https://docs.authsignal.com/authentication-methods/qr-code#4-mobile-app-approve-or-decline-the-challenge)
This documentation is built and hosted on [Mintlify](https://mintlify.com), a developer documentation platform.