> ## Documentation Index
> Fetch the complete documentation index at: https://docs.authsignal.com/llms.txt
> Use this file to discover all available pages before exploring further.
# Adding MFA to Duende IdentityServer
> Learn how to add MFA to Duende IdentityServer using Authsignal.
## Overview
[Duende IdentityServer](https://duendesoftware.com/products/identityserver) is an ASP.NET Core framework for building your own login server in compliance with OpenID Connect and OAuth 2.0 standards.
This guide shows how to integrate IdentityServer with Authsignal in order to add MFA after a traditional username & password flow.
 The solution in this example consists of 2 projects.
* [/src/IdentityServer](https://github.com/authsignal/identity-server-example/tree/main/src/IdentityServer)
\-- the login server running on `https://localhost:5001`
* [/src/WebClient](https://github.com/authsignal/identity-server-example/tree/main/src/WebClient)
\-- the application server running on `https://localhost:5002`
Duende IdentityServer + Authsignal example repository.
## Configuration
### Enabling authenticators
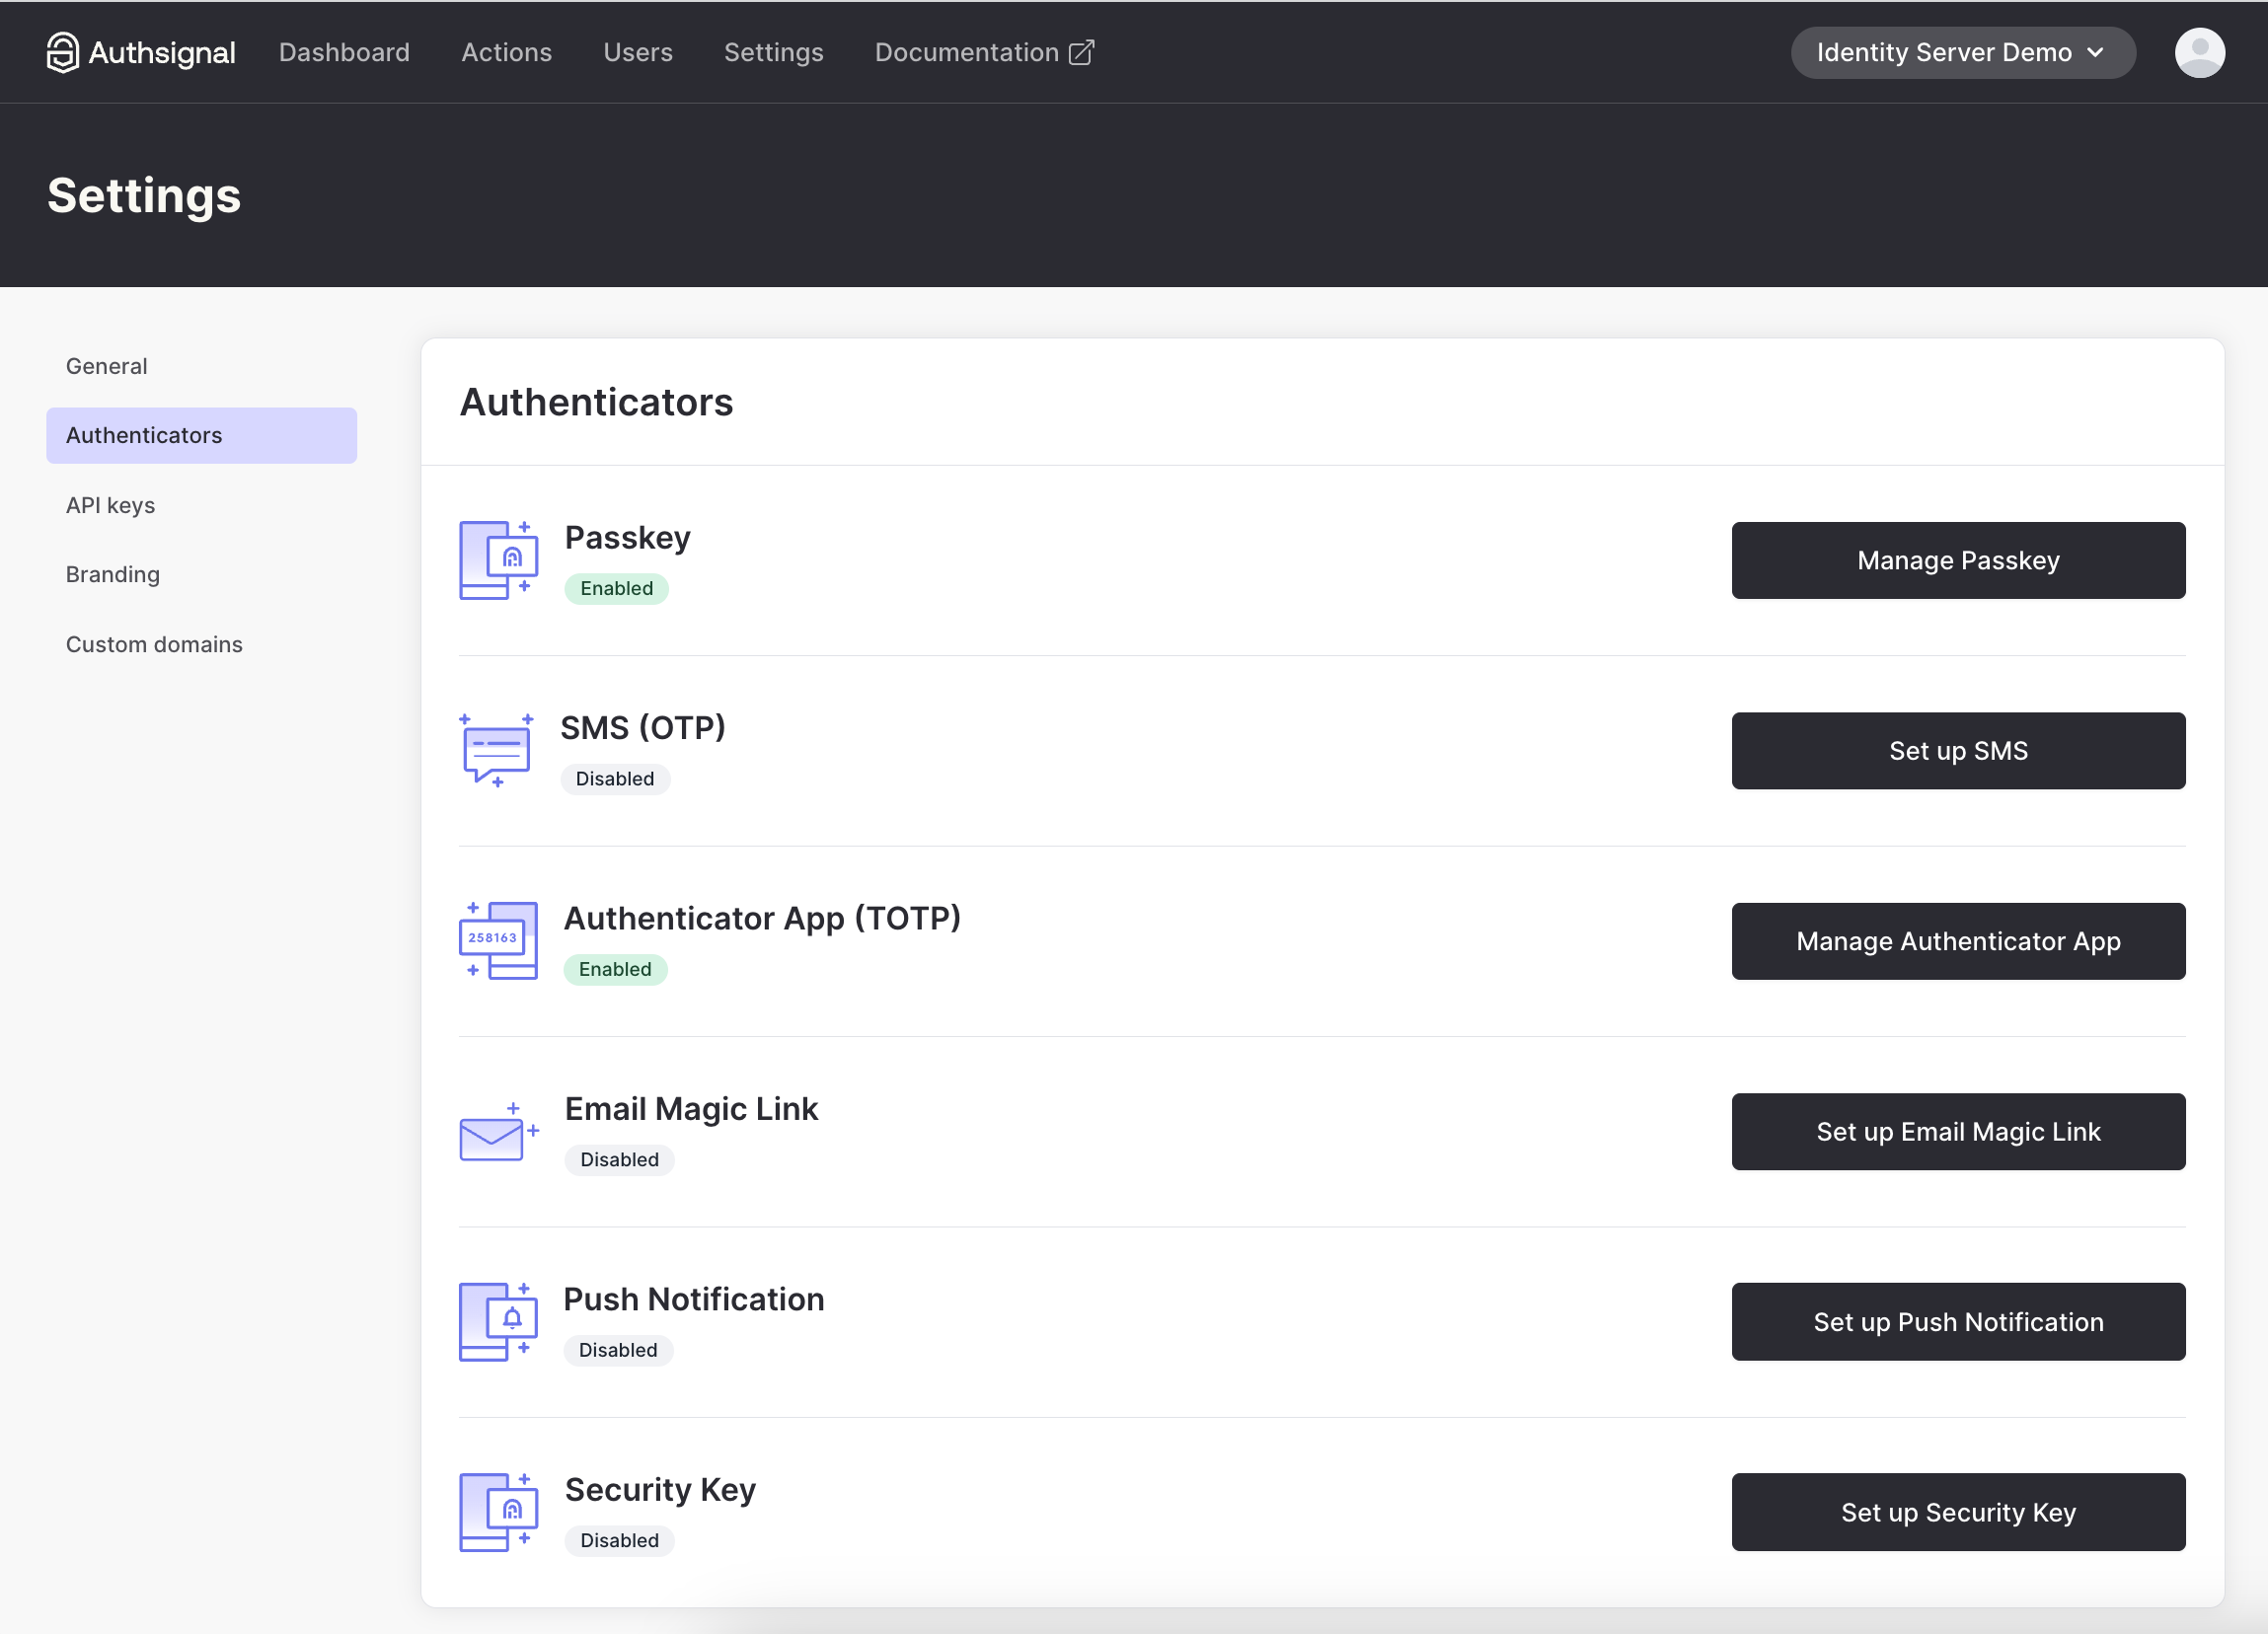
For the purposes of this example, we have enabled authenticator app on our tenant in the Authsignal Portal.
The solution in this example consists of 2 projects.
* [/src/IdentityServer](https://github.com/authsignal/identity-server-example/tree/main/src/IdentityServer)
\-- the login server running on `https://localhost:5001`
* [/src/WebClient](https://github.com/authsignal/identity-server-example/tree/main/src/WebClient)
\-- the application server running on `https://localhost:5002`
Duende IdentityServer + Authsignal example repository.
## Configuration
### Enabling authenticators
For the purposes of this example, we have enabled authenticator app on our tenant in the Authsignal Portal.
 ### Tenant credentials
Get your tenant's credentials from the [API keys page](https://portal.authsignal.com/organisations/tenants/api).
### Tenant credentials
Get your tenant's credentials from the [API keys page](https://portal.authsignal.com/organisations/tenants/api).
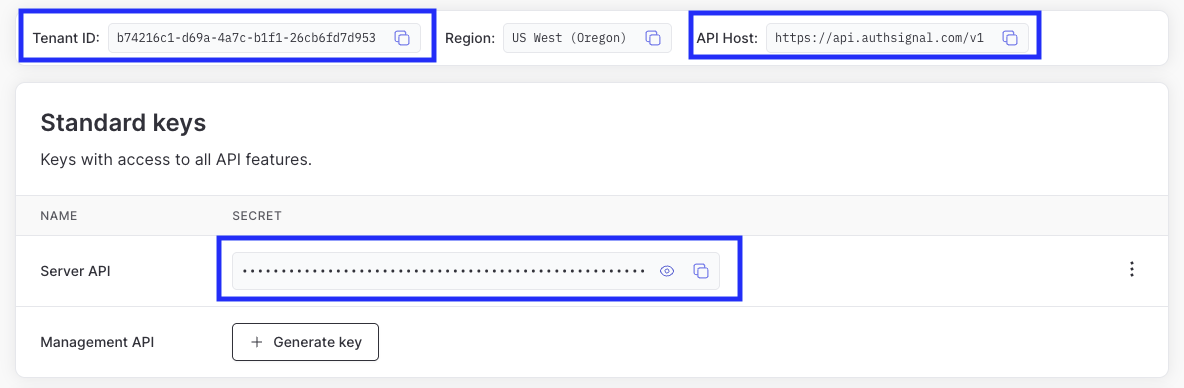 In your [appsettings.json](https://github.com/authsignal/identity-server-example/blob/main/src/IdentityServer/appsettings.json) file, set the `AuthsignalUrl` to your **API host** and `AuthsignalSecret` to your **Server API secret key**.
```json appsettings.json theme={null}
{
"AuthsignalUrl": "YOUR_API_HOST",
"AuthsignalSecret": "YOUR_SERVER_API_SECRET_KEY"
}
```
In your [client-side JS snippet](https://github.com/authsignal/identity-server-example/blob/main/src/IdentityServer/wwwroot/js/login.js) used for passkeys, set the `tenantId` to your **Tenant ID** and `baseUrl` to your **API host**.
```js login.js theme={null}
var client = new window.authsignal.Authsignal({
tenantId: "YOUR_TENANT_ID",
baseUrl: "YOUR_API_HOST",
});
```
## Adding MFA on login
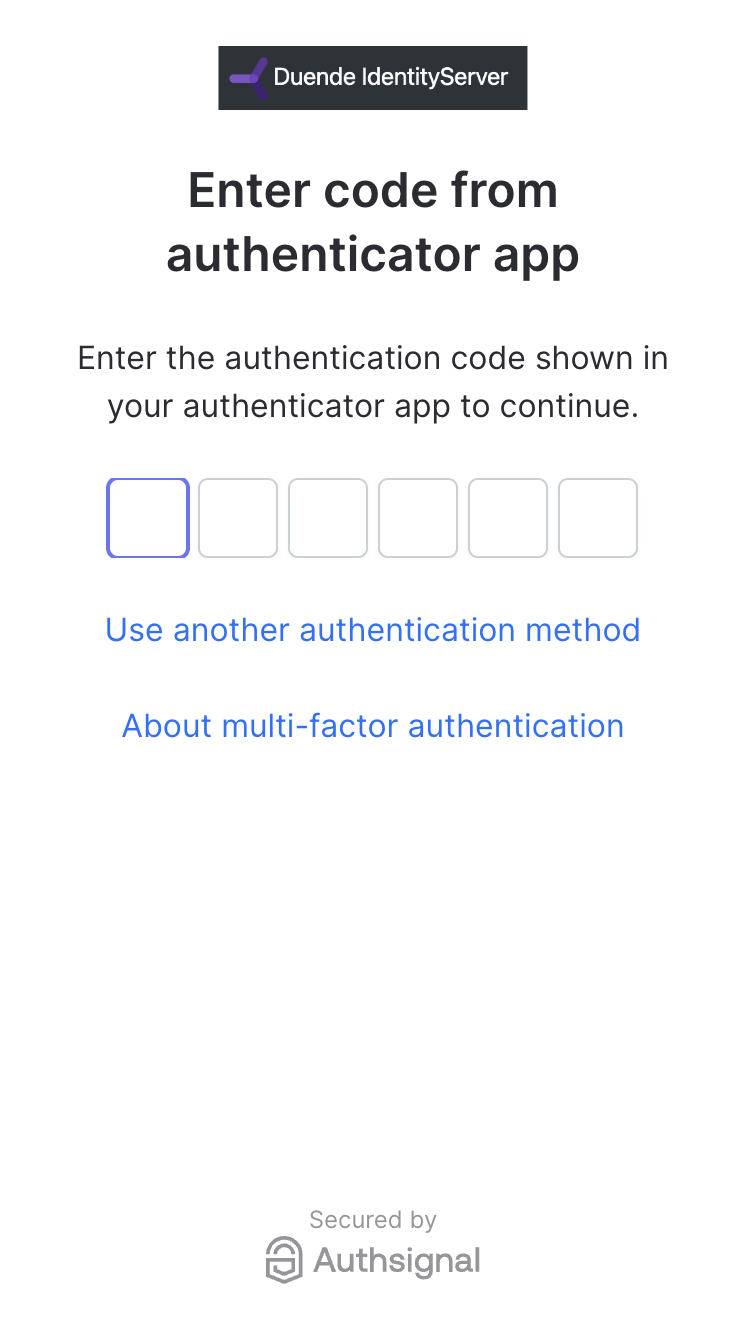
The quickest way to add MFA to IdentityServer is to use [Authsignal's pre-built UI](/implementation-options/prebuilt-ui/overview).
We will redirect the user here after validating their username and password.
Authsignal's pre-built UI can be [highly
customized](/implementation-options/prebuilt-ui/custom-branding) to align with your login server's
existing branding.
### Initiating the MFA challenge
To initiate an MFA challenge using the pre-built UI, we can [track an action](/implementation-options/prebuilt-ui/overview) and use the URL that is returned.
[/src/IdentityServer/Pages/Account/Login/Index.cshtml.cs](https://github.com/authsignal/identity-server-example/blob/main/src/IdentityServer/Pages/Account/Login/Index.cshtml.cs)
```csharp theme={null}
public async Task OnPost()
{
if (_users.ValidateCredentials(Input.Username, Input.Password))
{
var user = _users.FindByUsername(Input.Username);
var trackRequest = new TrackRequest(
UserId: user.SubjectId,
Action: "identity-server-login",
Attributes: new TrackAttributes(
Username: user.Username,
RedirectUrl: "https://localhost:5001/Account/Login/Callback?returnUrl=" + returnUrl
)
);
var trackResponse = await _authsignal.Track(trackRequest);
if (!trackResponse.IsEnrolled || trackResponse.State == UserActionState.CHALLENGE_REQUIRED)
{
return Redirect(trackResponse.Url);
}
}
}
```
For convenience we are prompting the user to enroll for MFA on login if they are not yet enrolled - but you can enroll users at a different point in your user journey as required.
The `RedirectUrl` we pass to the track request here will be a callback endpoint that we will add to IdentityServer to validate the result of the MFA challenge.
### Validating the MFA challenge
Once the user has been redirected back to IdentityServer, we need to validate the result.
We do this by implementing a callback page which uses the token that Authsignal's pre-built UI appends as a URL query param when redirecting the user back to IdentityServer.
This token is used to lookup the result of the challenge server-side.
[/src/IdentityServer/Pages/Account/Login/Callback.cshtml.cs](https://github.com/authsignal/identity-server-example/blob/main/src/IdentityServer/Pages/Account/Login/Callback.cshtml.cs)
```csharp theme={null}
public async Task OnGet(string returnUrl, string token)
{
var validateChallengeRequest = new ValidateChallengeRequest(Token: token);
var validateChallengeResponse = await _authsignal.ValidateChallenge(validateChallengeRequest);
var userId = validateChallengeResponse.UserId;
var user = _users.FindBySubjectId(userId);
if (validateChallengeResponse.State != UserActionState.CHALLENGE_SUCCEEDED)
{
// The user did not complete the MFA challenge successfully
// Redirect them back to the login page
return Redirect("https://localhost:5001/Account/Login?ReturnUrl=" + returnUrl);
}
// Proceed with authentication and issue session cookie
}
```
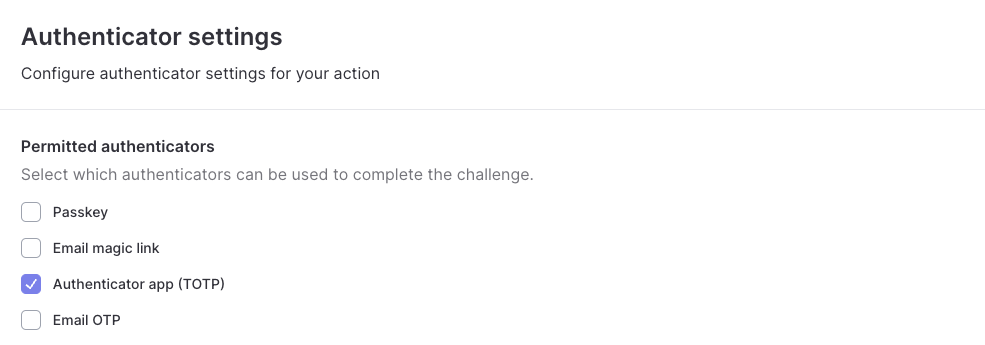
### Restricting MFA to authenticator apps
By default all authenticators which have been configured will be available to use on the pre-built UI, including passkeys.
We only want to allow users to use authenticator apps for MFA. To achieve this we can go to the [Settings](https://portal.authsignal.com/actions/signIn/settings) tab
of our `identity-server-login` action and update the permitted authenticators.
In your [appsettings.json](https://github.com/authsignal/identity-server-example/blob/main/src/IdentityServer/appsettings.json) file, set the `AuthsignalUrl` to your **API host** and `AuthsignalSecret` to your **Server API secret key**.
```json appsettings.json theme={null}
{
"AuthsignalUrl": "YOUR_API_HOST",
"AuthsignalSecret": "YOUR_SERVER_API_SECRET_KEY"
}
```
In your [client-side JS snippet](https://github.com/authsignal/identity-server-example/blob/main/src/IdentityServer/wwwroot/js/login.js) used for passkeys, set the `tenantId` to your **Tenant ID** and `baseUrl` to your **API host**.
```js login.js theme={null}
var client = new window.authsignal.Authsignal({
tenantId: "YOUR_TENANT_ID",
baseUrl: "YOUR_API_HOST",
});
```
## Adding MFA on login
The quickest way to add MFA to IdentityServer is to use [Authsignal's pre-built UI](/implementation-options/prebuilt-ui/overview).
We will redirect the user here after validating their username and password.
Authsignal's pre-built UI can be [highly
customized](/implementation-options/prebuilt-ui/custom-branding) to align with your login server's
existing branding.
### Initiating the MFA challenge
To initiate an MFA challenge using the pre-built UI, we can [track an action](/implementation-options/prebuilt-ui/overview) and use the URL that is returned.
[/src/IdentityServer/Pages/Account/Login/Index.cshtml.cs](https://github.com/authsignal/identity-server-example/blob/main/src/IdentityServer/Pages/Account/Login/Index.cshtml.cs)
```csharp theme={null}
public async Task OnPost()
{
if (_users.ValidateCredentials(Input.Username, Input.Password))
{
var user = _users.FindByUsername(Input.Username);
var trackRequest = new TrackRequest(
UserId: user.SubjectId,
Action: "identity-server-login",
Attributes: new TrackAttributes(
Username: user.Username,
RedirectUrl: "https://localhost:5001/Account/Login/Callback?returnUrl=" + returnUrl
)
);
var trackResponse = await _authsignal.Track(trackRequest);
if (!trackResponse.IsEnrolled || trackResponse.State == UserActionState.CHALLENGE_REQUIRED)
{
return Redirect(trackResponse.Url);
}
}
}
```
For convenience we are prompting the user to enroll for MFA on login if they are not yet enrolled - but you can enroll users at a different point in your user journey as required.
The `RedirectUrl` we pass to the track request here will be a callback endpoint that we will add to IdentityServer to validate the result of the MFA challenge.
### Validating the MFA challenge
Once the user has been redirected back to IdentityServer, we need to validate the result.
We do this by implementing a callback page which uses the token that Authsignal's pre-built UI appends as a URL query param when redirecting the user back to IdentityServer.
This token is used to lookup the result of the challenge server-side.
[/src/IdentityServer/Pages/Account/Login/Callback.cshtml.cs](https://github.com/authsignal/identity-server-example/blob/main/src/IdentityServer/Pages/Account/Login/Callback.cshtml.cs)
```csharp theme={null}
public async Task OnGet(string returnUrl, string token)
{
var validateChallengeRequest = new ValidateChallengeRequest(Token: token);
var validateChallengeResponse = await _authsignal.ValidateChallenge(validateChallengeRequest);
var userId = validateChallengeResponse.UserId;
var user = _users.FindBySubjectId(userId);
if (validateChallengeResponse.State != UserActionState.CHALLENGE_SUCCEEDED)
{
// The user did not complete the MFA challenge successfully
// Redirect them back to the login page
return Redirect("https://localhost:5001/Account/Login?ReturnUrl=" + returnUrl);
}
// Proceed with authentication and issue session cookie
}
```
### Restricting MFA to authenticator apps
By default all authenticators which have been configured will be available to use on the pre-built UI, including passkeys.
We only want to allow users to use authenticator apps for MFA. To achieve this we can go to the [Settings](https://portal.authsignal.com/actions/signIn/settings) tab
of our `identity-server-login` action and update the permitted authenticators.
 ## MFA with email
What if you're using email and password as your primary authentication step and you want to use an email-based Authsignal method (OTP or magic link) as the secondary MFA step?
In this scenario you're already capturing the user's email in the first step, so you want to avoid prompting the user to input their email again in the second step.
This can be achieved by passing the user's email with the track request.
```csharp {5} theme={null}
var trackRequest = new TrackRequest(
UserId: user.SubjectId,
Action: "identity-server-login",
Attributes: new TrackAttributes(
Email: user.Email,
RedirectUrl: "https://localhost:5001/Account/Login/Callback?returnUrl=" + returnUrl
)
);
```
Alternatively, you can use our Server SDK to [programmatically enroll the user with an email-based authenticator](/advanced-usage/programmatic-authenticator-management).
In either case, you'll likely also want to disable the **"Self-service management"** setting for your email authenticator in the Authsignal Portal.
This means the user will not be able to input or edit their email in the Authsignal UI themselves.
## Next steps
* [Adding passkeys to Duende IdentityServer](/integrations/identityserver/passkeys)
## MFA with email
What if you're using email and password as your primary authentication step and you want to use an email-based Authsignal method (OTP or magic link) as the secondary MFA step?
In this scenario you're already capturing the user's email in the first step, so you want to avoid prompting the user to input their email again in the second step.
This can be achieved by passing the user's email with the track request.
```csharp {5} theme={null}
var trackRequest = new TrackRequest(
UserId: user.SubjectId,
Action: "identity-server-login",
Attributes: new TrackAttributes(
Email: user.Email,
RedirectUrl: "https://localhost:5001/Account/Login/Callback?returnUrl=" + returnUrl
)
);
```
Alternatively, you can use our Server SDK to [programmatically enroll the user with an email-based authenticator](/advanced-usage/programmatic-authenticator-management).
In either case, you'll likely also want to disable the **"Self-service management"** setting for your email authenticator in the Authsignal Portal.
This means the user will not be able to input or edit their email in the Authsignal UI themselves.
## Next steps
* [Adding passkeys to Duende IdentityServer](/integrations/identityserver/passkeys)