> ## Documentation Index
> Fetch the complete documentation index at: https://docs.authsignal.com/llms.txt
> Use this file to discover all available pages before exploring further.
# QR code verification
> Enable cross-device authentication by scanning QR codes with mobile apps.
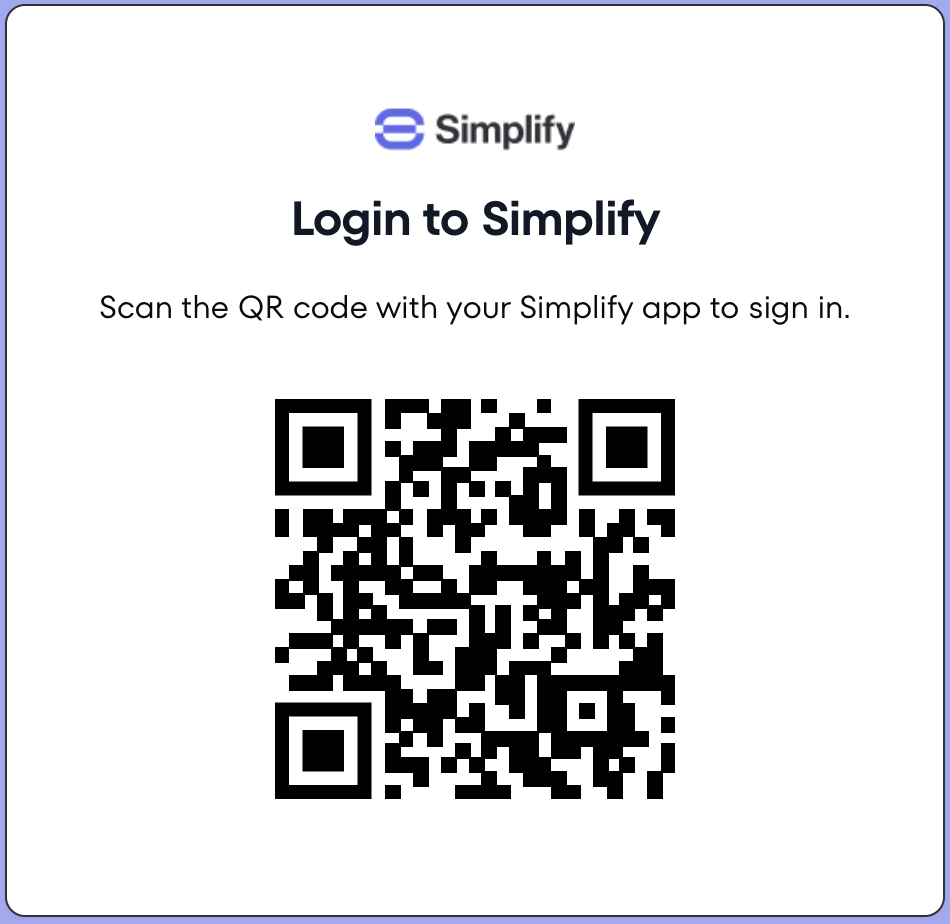 QR code verification uses app credentials to enable cross-device authentication. This method leverages public key cryptography where private keys are securely stored on the user's device.
The [Mobile SDK](/sdks/client/mobile) is used for two key steps:
1. Registering a mobile device for QR code verification by [adding a credential](/sdks/client/mobile/qr-code-verification#adding-a-credential). This step creates a new public/private key pair.
2. Responding to an authentication request by [approving or rejecting a challenge](/sdks/client/mobile/qr-code-verification#updating-a-challenge). This step uses the device's private key to sign a message which is verified on the server using the public key.
## Use cases
* Log into a desktop or web application from an application that is typically used on mobile
* Identify a user on a kiosk in a quick service restaurant (QSR) to load loyalty programs, rewards and offers
* Log into an application running on a TV
* Complete a payment via a terminal
## Sequence diagram
```mermaid theme={null}
sequenceDiagram
participant M as Mobile App (Authenticated)
participant W as Desktop / Kiosk / Terminal
participant B as Your Backend
participant C as Authsignal Client API
participant S as Authsignal Server API
rect rgb(191, 223, 255)
note right of W: Using Authsignal's Web SDK
W->>C: Request QR Code Challenge
activate C
C->>W: Return Challenge
deactivate C
W-->>C: Poll Challenge Result
end
W-->>M: Display Challenge Id via QR Code
M-->>W: Scan QR code to get Challenge Id
rect rgb(191, 223, 255)
note right of M: Using Authsignal's Mobile SDK
M->>C: Claim Challenge
activate C
C->>M: Return Challenge Context
deactivate C
M->>C: Approve/Decline Challenge
end
C-->>W: Return Challenge Result
W->>B: Validate Challenge
B->>S: Validate Challenge
activate S
S->>B: Challenge Result
deactivate S
```
The general flow for QR code verification is as follows:
1. Generate a challenge
2. Display the QR code to the user
3. Wait for the user to scan and respond on their mobile device
4. Handle the authentication result (approved/rejected)
## Portal setup
Enable [QR code verification](https://portal.authsignal.com/organisations/tenants/authenticators/qr_code) for your tenant.
## SDK setup
### Server SDK
Initialize the SDK using your Server API secret key from the [API keys page](https://portal.authsignal.com/organisations/tenants/api) and the [API URL](/sdks/server/setup#regions) for your region.
```ts Node.js theme={null}
import { Authsignal } from "@authsignal/node";
const authsignal = new Authsignal({
apiSecretKey: "YOUR_SECRET_KEY",
apiUrl: "YOUR_API_URL",
});
```
```csharp C# theme={null}
using Authsignal;
var authsignal = new AuthsignalClient(
apiSecretKey: "YOUR_SECRET_KEY",
apiUrl: "YOUR_API_URL"
);
```
```java Java theme={null}
import com.authsignal.AuthsignalClient;
AuthsignalClient authsignal = new AuthsignalClient(
"YOUR_SECRET_KEY",
"YOUR_API_URL"
);
```
```ruby Ruby theme={null}
require 'authsignal'
Authsignal.setup do |config|
config.api_secret_key = ENV["YOUR_SECRET_KEY"]
config.api_url = "YOUR_API_URL"
end
```
```python Python theme={null}
from authsignal.client import AuthsignalClient
authsignal = AuthsignalClient(
api_secret_key="YOUR_SECRET_KEY",
api_url="YOUR_API_URL"
)
```
```php PHP theme={null}
Authsignal::setApiSecretKey("YOUR_SECRET_KEY");
Authsignal::setApiUrl("YOUR_API_URL");
```
```go Go theme={null}
import "github.com/authsignal/authsignalgo/v2/client"
client := NewAuthsignalClient(
"YOUR_SECRET_KEY",
"YOUR_API_URL",
)
```
### Web and Mobile SDKs
The [Web SDK](/sdks/client/web/setup) is used to initiate the challenge in a browser by generating a QR code.
The [Mobile SDK](/sdks/client/mobile/setup) is used to respond to the challenge in a mobile app by scanning the QR code.
Initialize both SDKs using your tenant ID from the [API keys page](https://portal.authsignal.com/organisations/tenants/api) and your [API URL](/sdks/server/setup#regions).
```ts Web theme={null}
import { Authsignal } from "@authsignal/browser";
const authsignal = new Authsignal({
tenantId: "YOUR_TENANT_ID",
baseUrl: "YOUR_API_URL",
});
```
```swift iOS theme={null}
import Authsignal
let authsignal = Authsignal(
tenantID: "YOUR_TENANT_ID",
baseURL: "YOUR_API_URL"
)
```
```kotlin Android theme={null}
import com.authsignal.Authsignal
val authsignal = Authsignal(
tenantID = "YOUR_TENANT_ID",
baseURL = "YOUR_API_URL",
)
```
```ts React Native theme={null}
import { Authsignal } from "react-native-authsignal";
const authsignal = new Authsignal({
tenantID: "YOUR_TENANT_ID",
baseURL: "YOUR_API_URL",
});
```
```dart Flutter theme={null}
import 'package:authsignal_flutter/authsignal_flutter.dart';
final authsignal = Authsignal(
"YOUR_TENANT_ID",
baseURL: "YOUR_API_URL"
);
```
## Enrollment
**Scenario** - Enroll users for QR code verification in your mobile app so it can be used as a
method for authenticating on another device.
### 1. Generate enrollment token
In your backend, track an action for a user (e.g. "addAuthenticator") to generate a short-lived token.
```ts Node.js theme={null}
const request = {
userId: "dc58c6dc-a1fd-4a4f-8e2f-846636dd4833",
action: "addAuthenticator",
attributes: {
scope: "add:authenticators",
},
};
const response = await authsignal.track(request);
const token = response.token;
```
```csharp C# theme={null}
var request = new TrackRequest(
UserId: "dc58c6dc-a1fd-4a4f-8e2f-846636dd4833",
Action: "addAuthenticator",
Attributes: new TrackAttributes(
Scope: "add:authenticators",
)
);
var response = await authsignal.Track(request);
var token = response.Token;
```
```java Java theme={null}
TrackRequest request = new TrackRequest();
request.userId = "dc58c6dc-a1fd-4a4f-8e2f-846636dd4833";
request.action = "addAuthenticator";
request.attributes = new TrackAttributes();
request.attributes.scope = "add:authenticators";
TrackResponse response = authsignal.track(request).get();
String token = response.token;
```
```ruby Ruby theme={null}
response = Authsignal.track({
user_id: "dc58c6dc-a1fd-4a4f-8e2f-846636dd4833",
action: "addAuthenticator",
attributes: {
scope: "add:authenticators",
}
})
token = response[:token]
```
```python Python theme={null}
response = authsignal.track(
user_id="dc58c6dc-a1fd-4a4f-8e2f-846636dd4833",
action="addAuthenticator",
attributes={
"scope": "add:authenticators",
}
)
token = response["token"]
```
```php PHP theme={null}
$response = Authsignal::track([
'userId' => "dc58c6dc-a1fd-4a4f-8e2f-846636dd4833",
'action' => "addAuthenticator",
'attributes' => [
'scope' => "add:authenticators",
]
]);
$token = $response["token"]
```
```go Go theme={null}
response, err := client.Track(
TrackRequest{
UserId: "dc58c6dc-a1fd-4a4f-8e2f-846636dd4833",
Action: "addAuthenticator",
Attributes: &TrackAttributes{
scope: "add:authenticators",
},
},
)
token := response.Token
```
This token will be used to authorize enrolling a new authentication method on their mobile device.
The **add:authenticators** scope is required to enroll a new authentication factor for an existing user.
This scope should only be used **when the user is in an already authenticated state**.
For more information on using scopes safely refer to our documentation on [authenticator binding](/advanced-usage/authenticator-binding).
### 2. Add credential
Use the token obtained in step 1 to enroll a new device credential for the user in the mobile app.
```swift iOS theme={null}
await authsignal.qr.addCredential(token: "eyJhbGciOiJ...")
```
```kotlin Android theme={null}
authsignal.qr.addCredential(token = "eyJhbGciOiJ...")
```
```ts React Native theme={null}
await authsignal.qr.addCredential({ token: "eyJhbGciOiJ..." });
```
```dart Flutter theme={null}
await authsignal.qr.addCredential("eyJhbGciOiJ...");
```
## Authentication
**Scenario** - Let users scan a QR code with their mobile app to authenticate on another device.
### 1. Track action (optional)
You may optionally track an action from your backend if you want to create a QR code challenge that can only be completed by a specific user or run rules on the action for [adaptive MFA](/actions-rules/rules/adaptive-mfa).
If you want to start a QR code challenge that can be claimed and completed by any user, skip to [step 2](#2-present-qr-code).
Track an action from your backend using our [Server SDK](/sdks/server/overview).
```ts Node.js theme={null}
const request = {
userId: "dc58c6dc-a1fd-4a4f-8e2f-846636dd4833",
action: "signIn",
};
const response = await authsignal.track(request);
if (response.state === "CHALLENGE_REQUIRED") {
// Obtain token to present challenge
const token = response.token;
}
```
```csharp C# theme={null}
var request = new TrackRequest(
UserId: "dc58c6dc-a1fd-4a4f-8e2f-846636dd4833",
Action: "signIn"
);
var response = await authsignal.Track(request);
if (response.State == UserActionState.CHALLENGE_REQUIRED)
{
// Obtain token to present challenge
var token = response.Token;
}
```
```java Java theme={null}
TrackRequest request = new TrackRequest();
request.userId = "dc58c6dc-a1fd-4a4f-8e2f-846636dd4833";
request.action = "signIn";
TrackResponse response = authsignal.track(request).get();
if (response.state.equals(UserActionState.CHALLENGE_REQUIRED)) {
// Obtain token to present challenge
String token = response.token;
}
```
```ruby Ruby theme={null}
response = Authsignal.track({
user_id: 'dc58c6dc-a1fd-4a4f-8e2f-846636dd4833',
action: 'signIn'
})
case response[:state]
when "CHALLENGE_REQUIRED"
# Obtain token to present challenge
token = response[:token]
end
```
```python Python theme={null}
response = authsignal.track(
user_id="dc58c6dc-a1fd-4a4f-8e2f-846636dd4833",
action="signIn"
)
if response["state"] == "CHALLENGE_REQUIRED":
# Obtain token to present challenge
token = response["token"]
```
```php PHP theme={null}
$response = $authsignal->track([
'userId' => 'dc58c6dc-a1fd-4a4f-8e2f-846636dd4833',
'action' => 'signIn'
]);
switch ($response['state']) {
case 'CHALLENGE_REQUIRED':
// Obtain token to present challenge
$token = $response['token'];
}
```
```go Go theme={null}
response, err := client.Track(
TrackRequest{
UserId: "dc58c6dc-a1fd-4a4f-8e2f-846636dd4833",
Action: "signIn",
},
)
switch response.State {
case "CHALLENGE_REQUIRED":
// Obtain token to present challenge
token := response.Token
}
```
Return the token to your frontend and call the Web SDK's `setToken` method.
```js theme={null}
authsignal.setToken(response.token);
```
When creating a QR code challenge after tracking an action, the custom data and action code must
be provided in the track request and cannot be overridden in the challenge request from the
frontend.
### 2. Present QR code
Use our [Web SDK](/sdks/client/web/qr-code-verification) to initiate a QR code challenge.
**Initiate QR code challenge**
Use the [qrCode.challenge()](/sdks/client/web/qr-code-verification#start-a-qr-code-challenge) method to initiate a challenge.
The SDK will handle all the complexity of managing the challenge lifecycle, including automatic refreshing and state updates.
By default the SDK will use WebSocket connections.
If your environment does not support WebSockets, you can fall back to polling using REST API calls by setting `polling` to `true`.
```js theme={null}
const { data } = await authsignal.qrCode.challenge({
action: "signIn",
onStateChange: (state, token) => {
switch (state) {
case "claimed":
// User has scanned the QR code - blur/hide it
console.log("QR code claimed by user");
break;
case "approved":
// Challenge approved - validate the token on your backend
if (token) {
validateChallengeOnBackend(token);
// Continue with the application flow
}
break;
case "rejected":
// Challenge rejected - show error and offer retry
console.log("Challenge rejected by user");
break;
}
},
onRefresh: ({ challengeId, expiresAt }) => {
// Update your QR code display with the new challengeId
updateQRCode(challengeId);
},
// Optional: Add context that will be shown on the user's device. Only available for anonymous challenges.
custom: {
deviceInfo: "Terminal A",
},
refreshInterval: 540000, // 9 minutes (default)
polling: false, // Use WebSocket for real-time updates (default)
});
// Display the QR code using the challengeId
if (data?.challengeId) {
displayQRCode(data.challengeId);
}
```
**State changes**
After calling `qrCode.challenge()`, the QR code is ready to be scanned. Display it to the user.
When `onStateChange` is called with `state: "claimed"`, the user has scanned the QR code. You can
use this state change to indicate progress in your UI.
When `onStateChange` is called with `state: "approved"` and a `token`, the user has approved the
challenge. Pass the token to your backend for validation.
When `onStateChange` is called with `state: "rejected"`, the user has declined the challenge. Show an error message and provide a way to retry.
**Refresh a challenge (optional)**
If you need to manually refresh a challenge you can use the [qrCode.refresh()](/sdks/client/web/qr-code-verification#refresh-a-qr-code-challenge) method:
```js theme={null}
// Manually refresh with optional updated context
await authsignal.qrCode.refresh({
custom: {
deviceInfo: "Terminal B",
},
});
```
This must be called after `qrCode.challenge()` method has been called. The original callbacks will be used with the new challenge.
### 3. Scan QR code
Once the user scans the QR code, use the mobile sdk [Claim Challenge](/sdks/client/mobile/qr-code-verification#claiming-a-challenge) method to set the user attempting to complete the challenge.
The Claim Challenge method will return some context about the desktop or kiosk initiating the challenge such as ip address, location, user agent and custom data.
This data can be shown to the user to help them decide if they want to approve or decline the challenge.
To display custom data points passed into the initial track request, mark the relevant [custom
data points](/actions-rules/rules/custom-data-points#public-custom-data-points) as public.
```swift iOS theme={null}
await authsignal.qr.claimChallenge(
challengeId: challengeId
)
```
```kotlin Android theme={null}
authsignal.qr.claimChallenge(
challengeId = challengeId
)
```
```ts React Native theme={null}
await authsignal.qr.claimChallenge({
challengeId,
});
```
```dart Flutter theme={null}
await authsignal.qr.claimChallenge(
challengeId,
);
```
### 4. Approve or decline the challenge
Present a dialog to allow the user to review the challenge context and approve or decline the challenge by calling the mobile sdk [Update Challenge](/sdks/client/mobile/qr-code-verification#updating-a-challenge) method.
```swift iOS theme={null}
await authsignal.qr.updateChallenge(
challengeId: challengeId,
approved: true
)
```
```kotlin Android theme={null}
authsignal.qr.updateChallenge(
challengeId = challengeId,
approved = true
)
```
```ts React Native theme={null}
await authsignal.qr.updateChallenge({
challengeId,
approved: true,
});
```
```dart Flutter theme={null}
await authsignal.qr.updateChallenge(
challengeId,
true,
);
```
### 5. Complete authentication
Once the challenge is approved, the `onStateChange` callback will return a `token` that should be passed to your backend to [validate the challenge for the action](/sdks/server/challenges#validate-challenge) and complete the authentication flow.
```ts Node.js theme={null}
const response = await authsignal.validateChallenge({
action: "signIn",
token: "eyJhbGciOiJIUzI....",
});
if (response.state === "CHALLENGE_SUCCEEDED") {
// User completed challenge successfully
}
```
```csharp C# theme={null}
var request = new ValidateChallengeRequest(
Action: "signIn",
Token: "eyJhbGciOiJIUzI...."
);
var response = await authsignal.ValidateChallenge(request);
if (response.State == UserActionState.CHALLENGE_SUCCEEDED) {
// User completed challenge successfully
}
```
```java Java theme={null}
ValidateChallengeRequest request = new ValidateChallengeRequest();
request.action = "signIn";
request.token = "eyJhbGciOiJIUzI....";
ValidateChallengeResponse response = authsignal.validateChallenge(request).get();
if (response.state == UserActionState.CHALLENGE_SUCCEEDED) {
// User completed challenge successfully
}
```
```ruby Ruby theme={null}
response = Authsignal.validate_challenge(action: "signIn", token: "eyJhbGciOiJIUzI....")
if response[:state] == "CHALLENGE_SUCCEEDED"
# User completed challenge successfully
end
```
```python Python theme={null}
response = authsignal.validate_challenge(action="signIn", token="eyJhbGciOiJIUzI....")
if response["state"] == "CHALLENGE_SUCCEEDED":
# User completed challenge successfully
```
```php PHP theme={null}
$response = Authsignal::validateChallenge(action: "signIn", token: "eyJhbGciOiJIUzI....");
if ($response["state"] === "CHALLENGE_SUCCEEDED") {
# User completed challenge successfully
}
```
```go Go theme={null}
response, err := client.ValidateChallenge(
ValidateChallengeRequest{
Action: "signIn",
Token: "eyJhbGciOiJ...",
},
)
if response.State == "CHALLENGE_SUCCEEDED" {
// User completed challenge successfully
}
```
## Next steps
* **[Passkeys](/authentication-methods/passkey/custom-ui)** - Offer the most secure and user-friendly passwordless authentication
QR code verification uses app credentials to enable cross-device authentication. This method leverages public key cryptography where private keys are securely stored on the user's device.
The [Mobile SDK](/sdks/client/mobile) is used for two key steps:
1. Registering a mobile device for QR code verification by [adding a credential](/sdks/client/mobile/qr-code-verification#adding-a-credential). This step creates a new public/private key pair.
2. Responding to an authentication request by [approving or rejecting a challenge](/sdks/client/mobile/qr-code-verification#updating-a-challenge). This step uses the device's private key to sign a message which is verified on the server using the public key.
## Use cases
* Log into a desktop or web application from an application that is typically used on mobile
* Identify a user on a kiosk in a quick service restaurant (QSR) to load loyalty programs, rewards and offers
* Log into an application running on a TV
* Complete a payment via a terminal
## Sequence diagram
```mermaid theme={null}
sequenceDiagram
participant M as Mobile App (Authenticated)
participant W as Desktop / Kiosk / Terminal
participant B as Your Backend
participant C as Authsignal Client API
participant S as Authsignal Server API
rect rgb(191, 223, 255)
note right of W: Using Authsignal's Web SDK
W->>C: Request QR Code Challenge
activate C
C->>W: Return Challenge
deactivate C
W-->>C: Poll Challenge Result
end
W-->>M: Display Challenge Id via QR Code
M-->>W: Scan QR code to get Challenge Id
rect rgb(191, 223, 255)
note right of M: Using Authsignal's Mobile SDK
M->>C: Claim Challenge
activate C
C->>M: Return Challenge Context
deactivate C
M->>C: Approve/Decline Challenge
end
C-->>W: Return Challenge Result
W->>B: Validate Challenge
B->>S: Validate Challenge
activate S
S->>B: Challenge Result
deactivate S
```
The general flow for QR code verification is as follows:
1. Generate a challenge
2. Display the QR code to the user
3. Wait for the user to scan and respond on their mobile device
4. Handle the authentication result (approved/rejected)
## Portal setup
Enable [QR code verification](https://portal.authsignal.com/organisations/tenants/authenticators/qr_code) for your tenant.
## SDK setup
### Server SDK
Initialize the SDK using your Server API secret key from the [API keys page](https://portal.authsignal.com/organisations/tenants/api) and the [API URL](/sdks/server/setup#regions) for your region.
```ts Node.js theme={null}
import { Authsignal } from "@authsignal/node";
const authsignal = new Authsignal({
apiSecretKey: "YOUR_SECRET_KEY",
apiUrl: "YOUR_API_URL",
});
```
```csharp C# theme={null}
using Authsignal;
var authsignal = new AuthsignalClient(
apiSecretKey: "YOUR_SECRET_KEY",
apiUrl: "YOUR_API_URL"
);
```
```java Java theme={null}
import com.authsignal.AuthsignalClient;
AuthsignalClient authsignal = new AuthsignalClient(
"YOUR_SECRET_KEY",
"YOUR_API_URL"
);
```
```ruby Ruby theme={null}
require 'authsignal'
Authsignal.setup do |config|
config.api_secret_key = ENV["YOUR_SECRET_KEY"]
config.api_url = "YOUR_API_URL"
end
```
```python Python theme={null}
from authsignal.client import AuthsignalClient
authsignal = AuthsignalClient(
api_secret_key="YOUR_SECRET_KEY",
api_url="YOUR_API_URL"
)
```
```php PHP theme={null}
Authsignal::setApiSecretKey("YOUR_SECRET_KEY");
Authsignal::setApiUrl("YOUR_API_URL");
```
```go Go theme={null}
import "github.com/authsignal/authsignalgo/v2/client"
client := NewAuthsignalClient(
"YOUR_SECRET_KEY",
"YOUR_API_URL",
)
```
### Web and Mobile SDKs
The [Web SDK](/sdks/client/web/setup) is used to initiate the challenge in a browser by generating a QR code.
The [Mobile SDK](/sdks/client/mobile/setup) is used to respond to the challenge in a mobile app by scanning the QR code.
Initialize both SDKs using your tenant ID from the [API keys page](https://portal.authsignal.com/organisations/tenants/api) and your [API URL](/sdks/server/setup#regions).
```ts Web theme={null}
import { Authsignal } from "@authsignal/browser";
const authsignal = new Authsignal({
tenantId: "YOUR_TENANT_ID",
baseUrl: "YOUR_API_URL",
});
```
```swift iOS theme={null}
import Authsignal
let authsignal = Authsignal(
tenantID: "YOUR_TENANT_ID",
baseURL: "YOUR_API_URL"
)
```
```kotlin Android theme={null}
import com.authsignal.Authsignal
val authsignal = Authsignal(
tenantID = "YOUR_TENANT_ID",
baseURL = "YOUR_API_URL",
)
```
```ts React Native theme={null}
import { Authsignal } from "react-native-authsignal";
const authsignal = new Authsignal({
tenantID: "YOUR_TENANT_ID",
baseURL: "YOUR_API_URL",
});
```
```dart Flutter theme={null}
import 'package:authsignal_flutter/authsignal_flutter.dart';
final authsignal = Authsignal(
"YOUR_TENANT_ID",
baseURL: "YOUR_API_URL"
);
```
## Enrollment
**Scenario** - Enroll users for QR code verification in your mobile app so it can be used as a
method for authenticating on another device.
### 1. Generate enrollment token
In your backend, track an action for a user (e.g. "addAuthenticator") to generate a short-lived token.
```ts Node.js theme={null}
const request = {
userId: "dc58c6dc-a1fd-4a4f-8e2f-846636dd4833",
action: "addAuthenticator",
attributes: {
scope: "add:authenticators",
},
};
const response = await authsignal.track(request);
const token = response.token;
```
```csharp C# theme={null}
var request = new TrackRequest(
UserId: "dc58c6dc-a1fd-4a4f-8e2f-846636dd4833",
Action: "addAuthenticator",
Attributes: new TrackAttributes(
Scope: "add:authenticators",
)
);
var response = await authsignal.Track(request);
var token = response.Token;
```
```java Java theme={null}
TrackRequest request = new TrackRequest();
request.userId = "dc58c6dc-a1fd-4a4f-8e2f-846636dd4833";
request.action = "addAuthenticator";
request.attributes = new TrackAttributes();
request.attributes.scope = "add:authenticators";
TrackResponse response = authsignal.track(request).get();
String token = response.token;
```
```ruby Ruby theme={null}
response = Authsignal.track({
user_id: "dc58c6dc-a1fd-4a4f-8e2f-846636dd4833",
action: "addAuthenticator",
attributes: {
scope: "add:authenticators",
}
})
token = response[:token]
```
```python Python theme={null}
response = authsignal.track(
user_id="dc58c6dc-a1fd-4a4f-8e2f-846636dd4833",
action="addAuthenticator",
attributes={
"scope": "add:authenticators",
}
)
token = response["token"]
```
```php PHP theme={null}
$response = Authsignal::track([
'userId' => "dc58c6dc-a1fd-4a4f-8e2f-846636dd4833",
'action' => "addAuthenticator",
'attributes' => [
'scope' => "add:authenticators",
]
]);
$token = $response["token"]
```
```go Go theme={null}
response, err := client.Track(
TrackRequest{
UserId: "dc58c6dc-a1fd-4a4f-8e2f-846636dd4833",
Action: "addAuthenticator",
Attributes: &TrackAttributes{
scope: "add:authenticators",
},
},
)
token := response.Token
```
This token will be used to authorize enrolling a new authentication method on their mobile device.
The **add:authenticators** scope is required to enroll a new authentication factor for an existing user.
This scope should only be used **when the user is in an already authenticated state**.
For more information on using scopes safely refer to our documentation on [authenticator binding](/advanced-usage/authenticator-binding).
### 2. Add credential
Use the token obtained in step 1 to enroll a new device credential for the user in the mobile app.
```swift iOS theme={null}
await authsignal.qr.addCredential(token: "eyJhbGciOiJ...")
```
```kotlin Android theme={null}
authsignal.qr.addCredential(token = "eyJhbGciOiJ...")
```
```ts React Native theme={null}
await authsignal.qr.addCredential({ token: "eyJhbGciOiJ..." });
```
```dart Flutter theme={null}
await authsignal.qr.addCredential("eyJhbGciOiJ...");
```
## Authentication
**Scenario** - Let users scan a QR code with their mobile app to authenticate on another device.
### 1. Track action (optional)
You may optionally track an action from your backend if you want to create a QR code challenge that can only be completed by a specific user or run rules on the action for [adaptive MFA](/actions-rules/rules/adaptive-mfa).
If you want to start a QR code challenge that can be claimed and completed by any user, skip to [step 2](#2-present-qr-code).
Track an action from your backend using our [Server SDK](/sdks/server/overview).
```ts Node.js theme={null}
const request = {
userId: "dc58c6dc-a1fd-4a4f-8e2f-846636dd4833",
action: "signIn",
};
const response = await authsignal.track(request);
if (response.state === "CHALLENGE_REQUIRED") {
// Obtain token to present challenge
const token = response.token;
}
```
```csharp C# theme={null}
var request = new TrackRequest(
UserId: "dc58c6dc-a1fd-4a4f-8e2f-846636dd4833",
Action: "signIn"
);
var response = await authsignal.Track(request);
if (response.State == UserActionState.CHALLENGE_REQUIRED)
{
// Obtain token to present challenge
var token = response.Token;
}
```
```java Java theme={null}
TrackRequest request = new TrackRequest();
request.userId = "dc58c6dc-a1fd-4a4f-8e2f-846636dd4833";
request.action = "signIn";
TrackResponse response = authsignal.track(request).get();
if (response.state.equals(UserActionState.CHALLENGE_REQUIRED)) {
// Obtain token to present challenge
String token = response.token;
}
```
```ruby Ruby theme={null}
response = Authsignal.track({
user_id: 'dc58c6dc-a1fd-4a4f-8e2f-846636dd4833',
action: 'signIn'
})
case response[:state]
when "CHALLENGE_REQUIRED"
# Obtain token to present challenge
token = response[:token]
end
```
```python Python theme={null}
response = authsignal.track(
user_id="dc58c6dc-a1fd-4a4f-8e2f-846636dd4833",
action="signIn"
)
if response["state"] == "CHALLENGE_REQUIRED":
# Obtain token to present challenge
token = response["token"]
```
```php PHP theme={null}
$response = $authsignal->track([
'userId' => 'dc58c6dc-a1fd-4a4f-8e2f-846636dd4833',
'action' => 'signIn'
]);
switch ($response['state']) {
case 'CHALLENGE_REQUIRED':
// Obtain token to present challenge
$token = $response['token'];
}
```
```go Go theme={null}
response, err := client.Track(
TrackRequest{
UserId: "dc58c6dc-a1fd-4a4f-8e2f-846636dd4833",
Action: "signIn",
},
)
switch response.State {
case "CHALLENGE_REQUIRED":
// Obtain token to present challenge
token := response.Token
}
```
Return the token to your frontend and call the Web SDK's `setToken` method.
```js theme={null}
authsignal.setToken(response.token);
```
When creating a QR code challenge after tracking an action, the custom data and action code must
be provided in the track request and cannot be overridden in the challenge request from the
frontend.
### 2. Present QR code
Use our [Web SDK](/sdks/client/web/qr-code-verification) to initiate a QR code challenge.
**Initiate QR code challenge**
Use the [qrCode.challenge()](/sdks/client/web/qr-code-verification#start-a-qr-code-challenge) method to initiate a challenge.
The SDK will handle all the complexity of managing the challenge lifecycle, including automatic refreshing and state updates.
By default the SDK will use WebSocket connections.
If your environment does not support WebSockets, you can fall back to polling using REST API calls by setting `polling` to `true`.
```js theme={null}
const { data } = await authsignal.qrCode.challenge({
action: "signIn",
onStateChange: (state, token) => {
switch (state) {
case "claimed":
// User has scanned the QR code - blur/hide it
console.log("QR code claimed by user");
break;
case "approved":
// Challenge approved - validate the token on your backend
if (token) {
validateChallengeOnBackend(token);
// Continue with the application flow
}
break;
case "rejected":
// Challenge rejected - show error and offer retry
console.log("Challenge rejected by user");
break;
}
},
onRefresh: ({ challengeId, expiresAt }) => {
// Update your QR code display with the new challengeId
updateQRCode(challengeId);
},
// Optional: Add context that will be shown on the user's device. Only available for anonymous challenges.
custom: {
deviceInfo: "Terminal A",
},
refreshInterval: 540000, // 9 minutes (default)
polling: false, // Use WebSocket for real-time updates (default)
});
// Display the QR code using the challengeId
if (data?.challengeId) {
displayQRCode(data.challengeId);
}
```
**State changes**
After calling `qrCode.challenge()`, the QR code is ready to be scanned. Display it to the user.
When `onStateChange` is called with `state: "claimed"`, the user has scanned the QR code. You can
use this state change to indicate progress in your UI.
When `onStateChange` is called with `state: "approved"` and a `token`, the user has approved the
challenge. Pass the token to your backend for validation.
When `onStateChange` is called with `state: "rejected"`, the user has declined the challenge. Show an error message and provide a way to retry.
**Refresh a challenge (optional)**
If you need to manually refresh a challenge you can use the [qrCode.refresh()](/sdks/client/web/qr-code-verification#refresh-a-qr-code-challenge) method:
```js theme={null}
// Manually refresh with optional updated context
await authsignal.qrCode.refresh({
custom: {
deviceInfo: "Terminal B",
},
});
```
This must be called after `qrCode.challenge()` method has been called. The original callbacks will be used with the new challenge.
### 3. Scan QR code
Once the user scans the QR code, use the mobile sdk [Claim Challenge](/sdks/client/mobile/qr-code-verification#claiming-a-challenge) method to set the user attempting to complete the challenge.
The Claim Challenge method will return some context about the desktop or kiosk initiating the challenge such as ip address, location, user agent and custom data.
This data can be shown to the user to help them decide if they want to approve or decline the challenge.
To display custom data points passed into the initial track request, mark the relevant [custom
data points](/actions-rules/rules/custom-data-points#public-custom-data-points) as public.
```swift iOS theme={null}
await authsignal.qr.claimChallenge(
challengeId: challengeId
)
```
```kotlin Android theme={null}
authsignal.qr.claimChallenge(
challengeId = challengeId
)
```
```ts React Native theme={null}
await authsignal.qr.claimChallenge({
challengeId,
});
```
```dart Flutter theme={null}
await authsignal.qr.claimChallenge(
challengeId,
);
```
### 4. Approve or decline the challenge
Present a dialog to allow the user to review the challenge context and approve or decline the challenge by calling the mobile sdk [Update Challenge](/sdks/client/mobile/qr-code-verification#updating-a-challenge) method.
```swift iOS theme={null}
await authsignal.qr.updateChallenge(
challengeId: challengeId,
approved: true
)
```
```kotlin Android theme={null}
authsignal.qr.updateChallenge(
challengeId = challengeId,
approved = true
)
```
```ts React Native theme={null}
await authsignal.qr.updateChallenge({
challengeId,
approved: true,
});
```
```dart Flutter theme={null}
await authsignal.qr.updateChallenge(
challengeId,
true,
);
```
### 5. Complete authentication
Once the challenge is approved, the `onStateChange` callback will return a `token` that should be passed to your backend to [validate the challenge for the action](/sdks/server/challenges#validate-challenge) and complete the authentication flow.
```ts Node.js theme={null}
const response = await authsignal.validateChallenge({
action: "signIn",
token: "eyJhbGciOiJIUzI....",
});
if (response.state === "CHALLENGE_SUCCEEDED") {
// User completed challenge successfully
}
```
```csharp C# theme={null}
var request = new ValidateChallengeRequest(
Action: "signIn",
Token: "eyJhbGciOiJIUzI...."
);
var response = await authsignal.ValidateChallenge(request);
if (response.State == UserActionState.CHALLENGE_SUCCEEDED) {
// User completed challenge successfully
}
```
```java Java theme={null}
ValidateChallengeRequest request = new ValidateChallengeRequest();
request.action = "signIn";
request.token = "eyJhbGciOiJIUzI....";
ValidateChallengeResponse response = authsignal.validateChallenge(request).get();
if (response.state == UserActionState.CHALLENGE_SUCCEEDED) {
// User completed challenge successfully
}
```
```ruby Ruby theme={null}
response = Authsignal.validate_challenge(action: "signIn", token: "eyJhbGciOiJIUzI....")
if response[:state] == "CHALLENGE_SUCCEEDED"
# User completed challenge successfully
end
```
```python Python theme={null}
response = authsignal.validate_challenge(action="signIn", token="eyJhbGciOiJIUzI....")
if response["state"] == "CHALLENGE_SUCCEEDED":
# User completed challenge successfully
```
```php PHP theme={null}
$response = Authsignal::validateChallenge(action: "signIn", token: "eyJhbGciOiJIUzI....");
if ($response["state"] === "CHALLENGE_SUCCEEDED") {
# User completed challenge successfully
}
```
```go Go theme={null}
response, err := client.ValidateChallenge(
ValidateChallengeRequest{
Action: "signIn",
Token: "eyJhbGciOiJ...",
},
)
if response.State == "CHALLENGE_SUCCEEDED" {
// User completed challenge successfully
}
```
## Next steps
* **[Passkeys](/authentication-methods/passkey/custom-ui)** - Offer the most secure and user-friendly passwordless authentication