> ## Documentation Index
> Fetch the complete documentation index at: https://docs.authsignal.com/llms.txt
> Use this file to discover all available pages before exploring further.
# Push verification
> Verify users by adding a secure "push" authentication method to your mobile apps.
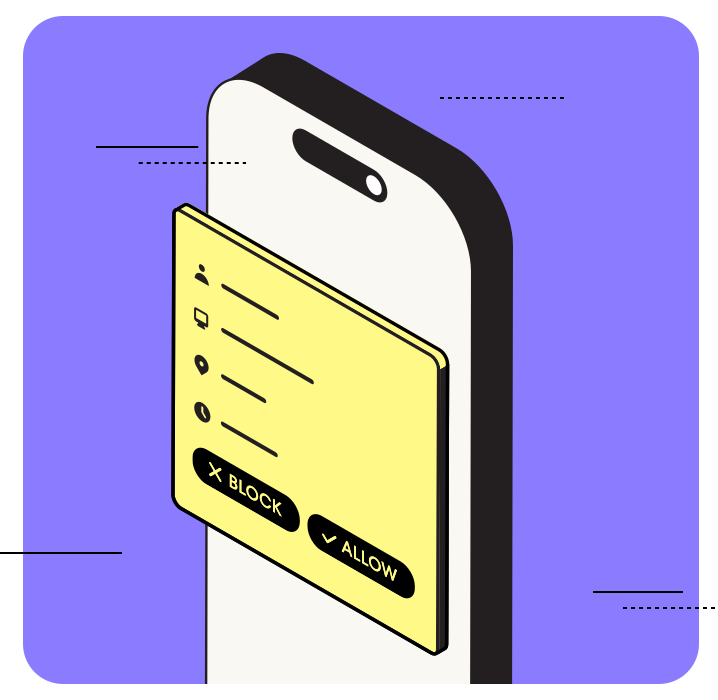 Push verification allows users to authenticate in a web browser by sending an authentication request to a mobile app.
Push notifications are used to improve the UX by prompting users to open their app but they are **not required for the method to work**.
The authentication mechanism is based on **public key cryptography** where private keys are securely stored on the user's mobile device and are used to sign messages which can be verified with the public key.
The [Mobile SDK](/sdks/client/mobile/setup) is used in push verification for two key steps:
1. Enrolling a user for push verification by [adding a credential](/sdks/client/mobile/push-verification#adding-a-credential) in the mobile app. This step creates a new public/private key pair.
2. Responding to an authentication challenge in the mobile app by [approving or denying it](/sdks/client/mobile/push-verification#updating-a-challenge). This step uses the mobile device's private key to sign a message which is verified on the server using the public key.
## Sequence diagram
The diagram below illustrates the sequence for a push verification challenge.
```mermaid theme={null}
sequenceDiagram
participant M as Mobile app
participant W as Webhook
participant AC as Authsignal Client API
participant F as Your web frontend
participant B as Your web backend
participant A as Authsignal Server API
B->>A: Track Action
A->>F: token
rect rgba(221, 237, 253, 1)
note left of F: Authsignal Web SDK
F->>AC: Start Push Challenge
AC->>W: challengeId
W->>M: Send push notification
F-->>AC: Verify Push Challenge
Push verification allows users to authenticate in a web browser by sending an authentication request to a mobile app.
Push notifications are used to improve the UX by prompting users to open their app but they are **not required for the method to work**.
The authentication mechanism is based on **public key cryptography** where private keys are securely stored on the user's mobile device and are used to sign messages which can be verified with the public key.
The [Mobile SDK](/sdks/client/mobile/setup) is used in push verification for two key steps:
1. Enrolling a user for push verification by [adding a credential](/sdks/client/mobile/push-verification#adding-a-credential) in the mobile app. This step creates a new public/private key pair.
2. Responding to an authentication challenge in the mobile app by [approving or denying it](/sdks/client/mobile/push-verification#updating-a-challenge). This step uses the mobile device's private key to sign a message which is verified on the server using the public key.
## Sequence diagram
The diagram below illustrates the sequence for a push verification challenge.
```mermaid theme={null}
sequenceDiagram
participant M as Mobile app
participant W as Webhook
participant AC as Authsignal Client API
participant F as Your web frontend
participant B as Your web backend
participant A as Authsignal Server API
B->>A: Track Action
A->>F: token
rect rgba(221, 237, 253, 1)
note left of F: Authsignal Web SDK
F->>AC: Start Push Challenge
AC->>W: challengeId
W->>M: Send push notification
F-->>AC: Verify Push Challenge
(Start polling)
rect rgb(191, 223, 255)
note right of M: Authsignal Mobile SDK
M->>AC: Get Device Challenge
AC->>M: challengeId
Note over M: Present approve/reject prompt
M->>AC: Update Device Challenge
end
AC-->>F: (Verify Push Challenge response)
isConsumed
isVerified
token
end
F->>B: token
B->>A: Validate Challenge
A->>B: Challenge result
Note over B: Proceed with login or
authenticated transaction
```
## Portal setup
Enable [push verification](https://portal.authsignal.com/organisations/tenants/authenticators/push) for your tenant and configure a webhook endpoint for sending push notifications to your app.
For more information on the payload which Authsignal sends to your webhook, refer to the [webhook schema documentation for push](/advanced-usage/webhooks/push-created).
Prefer not to run your own webhook? Authsignal can deliver push notifications for you - just connect
your APNs and/or FCM credentials in the portal. See [Managed push
notifications](/authentication-methods/app-verification/managed-push).
## SDK setup
### Server SDK
Initialize the SDK using your Server API secret key from the [API keys page](https://portal.authsignal.com/organisations/tenants/api) and the [API URL](/sdks/server/setup#regions) for your region.
```ts Node.js theme={null}
import { Authsignal } from "@authsignal/node";
const authsignal = new Authsignal({
apiSecretKey: "YOUR_SECRET_KEY",
apiUrl: "YOUR_API_URL",
});
```
```csharp C# theme={null}
using Authsignal;
var authsignal = new AuthsignalClient(
apiSecretKey: "YOUR_SECRET_KEY",
apiUrl: "YOUR_API_URL"
);
```
```java Java theme={null}
import com.authsignal.AuthsignalClient;
AuthsignalClient authsignal = new AuthsignalClient(
"YOUR_SECRET_KEY",
"YOUR_API_URL"
);
```
```ruby Ruby theme={null}
require 'authsignal'
Authsignal.setup do |config|
config.api_secret_key = ENV["YOUR_SECRET_KEY"]
config.api_url = "YOUR_API_URL"
end
```
```python Python theme={null}
from authsignal.client import AuthsignalClient
authsignal = AuthsignalClient(
api_secret_key="YOUR_SECRET_KEY",
api_url="YOUR_API_URL"
)
```
```php PHP theme={null}
Authsignal::setApiSecretKey("YOUR_SECRET_KEY");
Authsignal::setApiUrl("YOUR_API_URL");
```
```go Go theme={null}
import "github.com/authsignal/authsignalgo/v2/client"
client := NewAuthsignalClient(
"YOUR_SECRET_KEY",
"YOUR_API_URL",
)
```
### Web and Mobile SDKs
Initialize the [Web SDK](/sdks/client/web/setup) and [Mobile SDK](/sdks/client/mobile/setup) using your tenant ID from the [API keys page](https://portal.authsignal.com/organisations/tenants/api) and your [API URL](/sdks/server/setup#regions).
```ts Web theme={null}
import { Authsignal } from "@authsignal/browser";
const authsignal = new Authsignal({
tenantId: "YOUR_TENANT_ID",
baseUrl: "YOUR_API_URL",
});
```
```swift iOS theme={null}
import Authsignal
let authsignal = Authsignal(
tenantID: "YOUR_TENANT_ID",
baseURL: "YOUR_API_URL"
)
```
```kotlin Android theme={null}
import com.authsignal.Authsignal
val authsignal = Authsignal(
tenantID = "YOUR_TENANT_ID",
baseURL = "YOUR_API_URL",
)
```
```ts React Native theme={null}
import { Authsignal } from "react-native-authsignal";
const authsignal = new Authsignal({
tenantID: "YOUR_TENANT_ID",
baseURL: "YOUR_API_URL",
});
```
```dart Flutter theme={null}
import 'package:authsignal_flutter/authsignal_flutter.dart';
final authsignal = Authsignal(
"YOUR_TENANT_ID",
baseURL: "YOUR_API_URL"
);
```
## Enrollment
**Scenario** - Enroll users for push verification in your mobile app so it can be used later as a
method for adaptive MFA.
### 1. Generate enrollment token
In your backend, track an action for a user (e.g. "addAuthenticator") to generate a short-lived token.
```ts Node.js theme={null}
const request = {
userId: "dc58c6dc-a1fd-4a4f-8e2f-846636dd4833",
action: "addAuthenticator",
attributes: {
scope: "add:authenticators",
},
};
const response = await authsignal.track(request);
const token = response.token;
```
```csharp C# theme={null}
var request = new TrackRequest(
UserId: "dc58c6dc-a1fd-4a4f-8e2f-846636dd4833",
Action: "addAuthenticator",
Attributes: new TrackAttributes(
Scope: "add:authenticators",
)
);
var response = await authsignal.Track(request);
var token = response.Token;
```
```java Java theme={null}
TrackRequest request = new TrackRequest();
request.userId = "dc58c6dc-a1fd-4a4f-8e2f-846636dd4833";
request.action = "addAuthenticator";
request.attributes = new TrackAttributes();
request.attributes.scope = "add:authenticators";
TrackResponse response = authsignal.track(request).get();
String token = response.token;
```
```ruby Ruby theme={null}
response = Authsignal.track({
user_id: "dc58c6dc-a1fd-4a4f-8e2f-846636dd4833",
action: "addAuthenticator",
attributes: {
scope: "add:authenticators",
}
})
token = response[:token]
```
```python Python theme={null}
response = authsignal.track(
user_id="dc58c6dc-a1fd-4a4f-8e2f-846636dd4833",
action="addAuthenticator",
attributes={
"scope": "add:authenticators",
}
)
token = response["token"]
```
```php PHP theme={null}
$response = Authsignal::track([
'userId' => "dc58c6dc-a1fd-4a4f-8e2f-846636dd4833",
'action' => "addAuthenticator",
'attributes' => [
'scope' => "add:authenticators",
]
]);
$token = $response["token"]
```
```go Go theme={null}
response, err := client.Track(
TrackRequest{
UserId: "dc58c6dc-a1fd-4a4f-8e2f-846636dd4833",
Action: "addAuthenticator",
Attributes: &TrackAttributes{
scope: "add:authenticators",
},
},
)
token := response.Token
```
This token will be used to authorize enrolling a new push authentication method on their mobile device.
The **add:authenticators** scope is required to enroll a new authentication factor for an existing user.
This scope should only be used **when the user is in an already authenticated state**.
For more information on using scopes safely refer to our documentation on [authenticator binding](/advanced-usage/authenticator-binding).
### 2. Add credential
Use the token obtained in step 1 to enroll a new device credential for the user in the mobile app.
```swift iOS theme={null}
await authsignal.push.addCredential(token: "eyJhbGciOiJ...")
```
```kotlin Android theme={null}
authsignal.push.addCredential(token = "eyJhbGciOiJ...")
```
```ts React Native theme={null}
await authsignal.push.addCredential({ token: "eyJhbGciOiJ..." });
```
```dart Flutter theme={null}
await authsignal.push.addCredential("eyJhbGciOiJ...");
```
For more information on when in your app to add credentials refer to our documentation on the [enrollment lifecycle](/authentication-methods/app-verification/enrollment-lifecycle) for app verification.
## Adaptive MFA
**Scenario** - Strongly authenticate users in a web browser with push verification and use rules
to decide when and where to trigger the authentication.
### 1. Track action
When a user performs an action that requires push verification, your backend should track an action (e.g. "signIn") using our [Server SDK](/sdks/server/actions#track-action).
```ts Node.js theme={null}
const request = {
userId: "dc58c6dc-a1fd-4a4f-8e2f-846636dd4833",
action: "signIn",
};
const response = await authsignal.track(request);
if (response.state === "CHALLENGE_REQUIRED") {
// Obtain token to present challenge
const token = response.token;
}
```
```csharp C# theme={null}
var request = new TrackRequest(
UserId: "dc58c6dc-a1fd-4a4f-8e2f-846636dd4833",
Action: "signIn"
);
var response = await authsignal.Track(request);
if (response.State == UserActionState.CHALLENGE_REQUIRED)
{
// Obtain token to present challenge
var token = response.Token;
}
```
```java Java theme={null}
TrackRequest request = new TrackRequest();
request.userId = "dc58c6dc-a1fd-4a4f-8e2f-846636dd4833";
request.action = "signIn";
TrackResponse response = authsignal.track(request).get();
if (response.state.equals(UserActionState.CHALLENGE_REQUIRED)) {
// Obtain token to present challenge
String token = response.token;
}
```
```ruby Ruby theme={null}
response = Authsignal.track({
user_id: 'dc58c6dc-a1fd-4a4f-8e2f-846636dd4833',
action: 'signIn'
})
case response[:state]
when "CHALLENGE_REQUIRED"
# Obtain token to present challenge
token = response[:token]
end
```
```python Python theme={null}
response = authsignal.track(
user_id="dc58c6dc-a1fd-4a4f-8e2f-846636dd4833",
action="signIn"
)
if response["state"] == "CHALLENGE_REQUIRED":
# Obtain token to present challenge
token = response["token"]
```
```php PHP theme={null}
$response = $authsignal->track([
'userId' => 'dc58c6dc-a1fd-4a4f-8e2f-846636dd4833',
'action' => 'signIn'
]);
switch ($response['state']) {
case 'CHALLENGE_REQUIRED':
// Obtain token to present challenge
$token = $response['token'];
}
```
```go Go theme={null}
response, err := client.Track(
TrackRequest{
UserId: "dc58c6dc-a1fd-4a4f-8e2f-846636dd4833",
Action: "signIn",
},
)
switch response.State {
case "CHALLENGE_REQUIRED":
// Obtain token to present challenge
token := response.Token
}
```
```ts Node.js theme={null}
const request = {
userId: "dc58c6dc-a1fd-4a4f-8e2f-846636dd4833",
action: "signIn",
attributes: {
redirectUrl: "https://yourapp.com/callback",
},
};
const response = await authsignal.track(request);
if (response.state === "CHALLENGE_REQUIRED") {
// Return URL to your frontend to launch pre-built UI
const url = response.url;
}
```
```csharp C# theme={null}
var request = new TrackRequest(
UserId: "dc58c6dc-a1fd-4a4f-8e2f-846636dd4833",
Action: "signIn",
Attributes: new TrackAttributes(
RedirectUrl: "https://yourapp.com/callback",
)
);
var response = await authsignal.Track(request);
if (response.State == UserActionState.CHALLENGE_REQUIRED)
{
// Return URL to your frontend to launch pre-built UI
var url = response.Url;
}
```
```java Java theme={null}
TrackRequest request = new TrackRequest();
request.userId = "dc58c6dc-a1fd-4a4f-8e2f-846636dd4833";
request.action = "signIn";
request.attributes = new TrackAttributes();
request.attributes.redirectUrl = "https://yourapp.com/callback";
TrackResponse response = authsignal.track(trackRequest).get();
if (response.state.equals(UserActionState.CHALLENGE_REQUIRED)) {
// Return URL to your frontend to launch pre-built UI
String url = response.url;
}
```
```ruby Ruby theme={null}
response = Authsignal.track({
user_id: 'dc58c6dc-a1fd-4a4f-8e2f-846636dd4833',
action: 'signIn',
attributes: {
redirect_url: "https://yourapp.com/callback"
}
})
case response[:state]
when "CHALLENGE_REQUIRED"
# Return URL to your frontend to launch pre-built UI
url = response[:url]
end
```
```python Python theme={null}
response = authsignal.track(
user_id="dc58c6dc-a1fd-4a4f-8e2f-846636dd4833",
action="signIn",
attributes={
"redirectUrl": "https://yourapp.com/callback"
}
)
if response["state"] == "CHALLENGE_REQUIRED":
# Return URL to your frontend to launch pre-built UI
url = response["url"]
```
```php PHP theme={null}
$response = $authsignal->track([
'userId' => 'dc58c6dc-a1fd-4a4f-8e2f-846636dd4833',
'action' => 'signIn',
'attributes' => [
'redirectUrl' => 'https://yourapp.com/callback'
]
]);
switch ($response['state']) {
case 'CHALLENGE_REQUIRED':
// Return URL to your frontend to launch pre-built UI
$url = $response['url'];
}
```
```go Go theme={null}
response, err := client.Track(
TrackRequest{
UserId: "dc58c6dc-a1fd-4a4f-8e2f-846636dd4833",
Action: "signIn",
Attributes: &TrackAttributes{
RedirectUrl: "https://yourapp.com/callback",
},
},
)
switch response.State {
case "CHALLENGE_REQUIRED":
// Return URL to your frontend to launch pre-built UI
url := response.Url
}
```
### 2. Initiate challenge in browser
In the browser, use our [Web SDK](/sdks/client/web/push-verification#start-a-push-challenge) to initiate a push challenge.
This will trigger a call to your webhook with the [push event schema](/advanced-usage/webhooks/push-created) so that it can send the user a push notification.
If a user has enrolled more than one push authenticator, you can target a specific one by passing
its `userAuthenticatorId` to the [push
challenge](/sdks/client/web/push-verification#start-a-push-challenge). Only that authenticator
receives the challenge and can approve it.
```ts theme={null}
// Set the token obtained from the track response
authsignal.setToken(token);
// Initiate the push challenge
const response = await authsignal.push.challenge();
// Obtain a challenge ID to poll for the result in the next step
const challengeId = response.data?.challengeId;
```
Then you can immediately start polling for the challenge result.
```ts theme={null}
// Poll for the challenge result
const { data, error } = await authsignal.push.verify({ challengeId });
if (error || !data) {
// Handle error
} else if (!data.isConsumed) {
// The challenge has not yet been consumed
// Continue polling
} else {
// The challenge has been consumed
// Stop polling and check if approved or rejected
if (data.isVerified) {
// Challenge has been approved
// Obtain new token to send to backend to validate action
const validationToken = data.token;
} else {
// Challenge has been rejected
}
}
```
```js theme={null}
// Launch the pre-built UI with the URL from the track response
const result = await authsignal.launch(url, { popup: true });
// Get a new token to validate the action on your backend
if (result.token) {
const validationToken = result.token;
}
```
### 3. Check for pending challenge in mobile app
Use the mobile SDK's [Get Challenge](/sdks/client/mobile/push-verification#getting-a-challenge) method to check if there is a pending challenge for the device.
```swift iOS theme={null}
let response = await authsignal.push.getChallenge()
if let error = result.error {
// The credential stored on the device is invalid
} else if let challenge = result.data {
// A pending challenge request is available
// Present the user with a prompt to approve or deny the request
let challengeId = challenge.challengeId
} else {
// No pending challenge request
}
```
```kotlin Android theme={null}
val response = authsignal.push.getChallenge()
if (response.error != null) {
// The credential stored on the device is invalid
} else if (response.data != null) {
// A pending challenge request is available
// Present the user with a prompt to approve or deny the request
val challengeId = response.data.challengeId
} else {
// No pending challenge request
}
```
```ts React Native theme={null}
const {data, error} = await authsignal.push.getChallenge();
if (error) {
// The credential stored on the device is invalid
} else if (data) {
// A pending challenge request is available
// Present the user with a prompt to approve or deny the request
val challengeId = data.challengeId
} else {
// No pending challenge request
}
```
```dart Flutter theme={null}
final response = await authsignal.push.getChallenge();
if (response.error != null) {
// The credential stored on the device is invalid
} else if (response.data != null) {
// A pending challenge request is available
// Present the user with a prompt to approve or deny the request
final challengeId = response.data.challengeId;
} else {
// No pending challenge request
}
```
This check should be done when **launching** or **foregrounding** the app - either from a push notification or when opened manually - as well as when the app receives a push notification while it is **already foregrounded**.
To display custom data points passed into the initial track request, mark the relevant [custom
data points](/actions-rules/rules/custom-data-points#public-custom-data-points) as public.
### 4. Present challenge in mobile app
If there is a pending challenge, present a dialog to allow the user to approve or reject the challenge.
To approve or reject the challenge, use the mobile SDK's [Update Challenge](/sdks/client/mobile/push-verification#updating-a-challenge) method.
```swift iOS theme={null}
await authsignal.push.updateChallenge(
challengeId: challengeId,
approved: true
)
```
```kotlin Android theme={null}
authsignal.push.updateChallenge(
challengeId = challengeId,
approved = true
)
```
```ts React Native theme={null}
await authsignal.push.updateChallenge({
challengeId,
approved: true,
});
```
```dart Flutter theme={null}
await authsignal.push.updateChallenge(
challengeId,
true,
);
```
### 5. Complete authentication in browser
Once the challenge is approved, the polling request initiated in the web browser in step 2 will return a token that should be passed to your web browser app's backend to [validate the action](/sdks/server/challenges#validate-challenge) in order to complete the authentication flow.
```ts Node.js theme={null}
const response = await authsignal.validateChallenge({
action: "signIn",
token: "eyJhbGciOiJIUzI....",
});
if (response.state === "CHALLENGE_SUCCEEDED") {
// User completed challenge successfully
}
```
```csharp C# theme={null}
var request = new ValidateChallengeRequest(
Action: "signIn",
Token: "eyJhbGciOiJIUzI...."
);
var response = await authsignal.ValidateChallenge(request);
if (response.State == UserActionState.CHALLENGE_SUCCEEDED) {
// User completed challenge successfully
}
```
```java Java theme={null}
ValidateChallengeRequest request = new ValidateChallengeRequest();
request.action = "signIn";
request.token = "eyJhbGciOiJIUzI....";
ValidateChallengeResponse response = authsignal.validateChallenge(request).get();
if (response.state == UserActionState.CHALLENGE_SUCCEEDED) {
// User completed challenge successfully
}
```
```ruby Ruby theme={null}
response = Authsignal.validate_challenge(action: "signIn", token: "eyJhbGciOiJIUzI....")
if response[:state] == "CHALLENGE_SUCCEEDED"
# User completed challenge successfully
end
```
```python Python theme={null}
response = authsignal.validate_challenge(action="signIn", token="eyJhbGciOiJIUzI....")
if response["state"] == "CHALLENGE_SUCCEEDED":
# User completed challenge successfully
```
```php PHP theme={null}
$response = Authsignal::validateChallenge(action: "signIn", token: "eyJhbGciOiJIUzI....");
if ($response["state"] === "CHALLENGE_SUCCEEDED") {
# User completed challenge successfully
}
```
```go Go theme={null}
response, err := client.ValidateChallenge(
ValidateChallengeRequest{
Action: "signIn",
Token: "eyJhbGciOiJ...",
},
)
if response.State == "CHALLENGE_SUCCEEDED" {
// User completed challenge successfully
}
```
## Next steps
* **[Adaptive MFA](/actions-rules/rules/adaptive-mfa)** - Set up smart rules to trigger authentication based on risk
* **[QR code](/authentication-methods/qr-code)** - Implement QR code authentication
* **[Trusted device](/authentication-methods/trusted-device)** - Implement trusted device authentication
* **[Passkeys](/authentication-methods/passkey/custom-ui)** - Offer the most secure and user-friendly passwordless authentication